Accounts
Administering an account
As a company administrator, you can do the following to administer accounts in your company:
- Modify an account
- Modify multiple accounts
- Clone an account
- Delete an account
- Move a sub-account to a different parent account
Modifying an Account
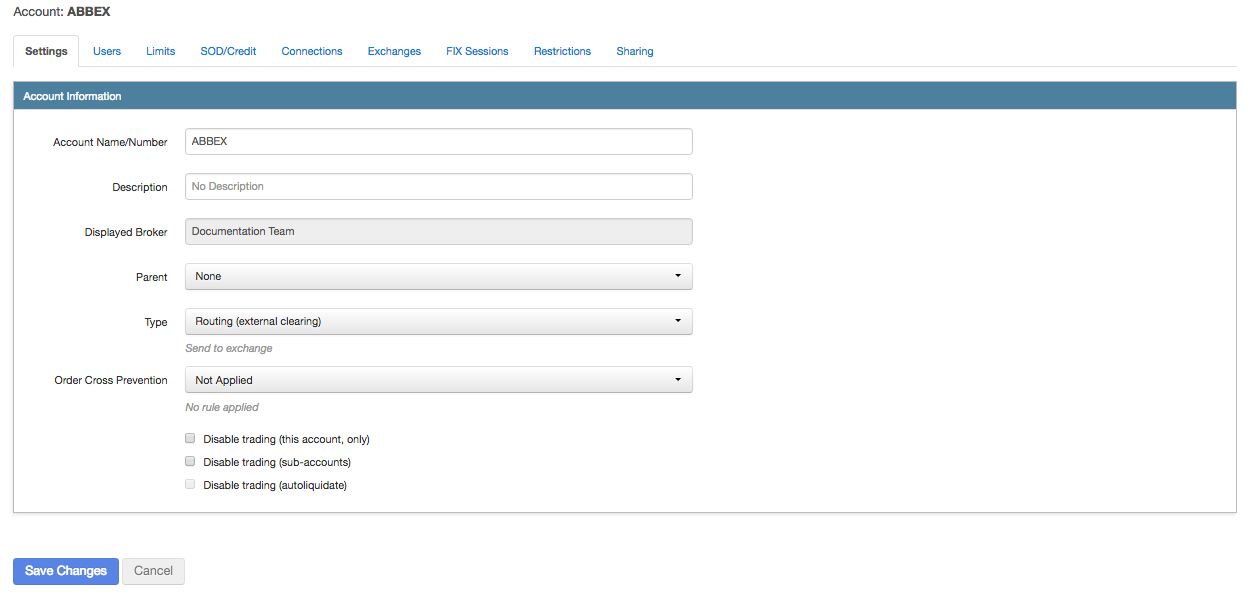
On the Accounts screen, you can modify an existing account. After creating an account, use the Settings tab to make changes. To access the Settings tab for an existing account, select the account from the Accounts data grid at the top of the screen.
To modify an account:
- Click Accounts in the left navigation pane and select an account from the data grid.
Click the Settings tab to modify the account settings in the Account Information section.
Modifying multiple accounts
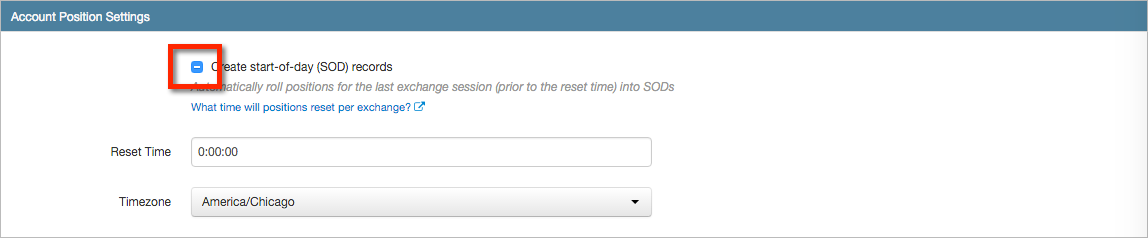
You can select multiple accounts, edit the settings once, and apply the changes to all the selected accounts in the Accounts grid. Settings include Account type, order cross prevention, disable trading, position reset, and SOD record creation.
To edit multiple accounts...
- Check the checkbox next to each account that you want to edit in the Accounts grid.
The yellow bar at the bottom of the grid appears, indicating that you are mass-editing multiple accounts.

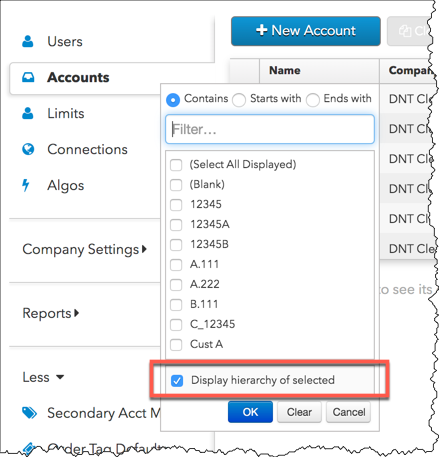
Tip: Click the "Name" column dropdown to filter the account names and click Display hierarchy of selected to view sub-accounts for the filtered accounts.
- Edit the available fields. A value of "[Multiple Values]" indicates that the selected accounts have differing values in that field. A checkbox value of " - " indicates that the selected accounts have differing checkbox values:

- Click Save.
Cloning an Account
Use the clone feature to copy account settings when creating a new account. For example, you can select a parent account, but clone it as a sub-account that uses the same settings as its parent account. All properties including exchange connection properties are cloned.
On the Accounts screen, you can clone existing accounts. After creating the account, use the Settings tab to make changes. To access the Settings tab for an existing account, select the account from the Accounts Grid at the top of the screen.
To clone an account:
- Click Accounts in the left navigation pane and select an account from the data grid.
- Click Clone at the top of the Accounts screen.
- In the clone account screen (e.g., Clone XYZ), enter an account name and select the following options:
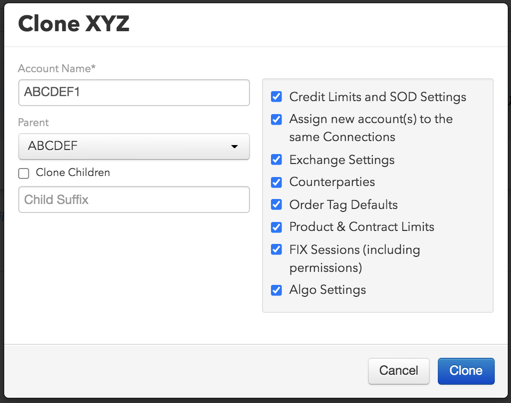
- Account Name — The name for the new account being cloned.
- Parent — Adds or changes the parent account for the account being cloned.
- Clone Children — Check this option to include any child sub-accounts of the parent account being cloned.
Child Suffix — Adds a suffix to the cloned child account(s). This field is required when Clone Children is checked.
- Credit Limits — Check this option to include the credit limits of the account being cloned. Uncheck this option to exclude the credit limits. This option is checked by default.
- Assign new account(s) to the same Connections — Check this option to include the connections assigned to the account being cloned. Uncheck to exclude the connections. This option is checked by default.
- Exchange Settings — Check this option to include the exchange settings of the account being cloned. Uncheck to exclude the settings. This option is checked by default.
- Counterparties — Check this option to include counterparties assigned to the account being cloned. Uncheck to exclude the settings. This option is checked by default.
- Order Tag Defaults — Check this option to clone the order tag defaults for this account. Uncheck to exclude the settings. This option is checked by default.
- Product & Contract Limits — Check this option to include the product and contract risk limits of the account being cloned. Uncheck to exclude the risk limits. This option is checked by default.
- Assign new account(s) to the same Users — Check this option to include the users assigned to the account being cloned. Uncheck to exclude the users. This option is checked by default.
- FIX Sessions (including permissions) — Check this option to include the FIX sessions assigned to the account being cloned. Uncheck to exclude the FIX sessions. This option is checked by default.
Deleting or Moving an Account
Using the Accounts screen, you can delete an account or move a child account (sub-account) to another parent account or back to "root" (select None) to make it a stand-alone account. When moving a child account, consider the following:
- Connections that were not inherited from the parent account move with the child account. The child account then inherits the connections from the new parent account, and loses any connections that had been inherited from the previous parent account.
- The child account’s settings and users are also moved. However, if the new parent account has Disable Trading (sub accounts) or Prevent Order crossing (for this account and all sub-accounts) or any account restrictions enabled, those settings now apply to the child account.
- You can select multiple accounts in the Accounts grid and delete them.
- Error accounts assigned to FIX Order Routing or FIX Inbound Drop Copy sessions cannot be deleted until they are removed from the sessions.
Note: You cannot move or delete a parent account or child sub-account that has open positions or trading activity since the last position reset time. After the position reset time, an account or sub-account with no open positions or trading activity may be safely moved or deleted.
To delete or move an account:
Note: Delete/move impacts the parent account and any of its child accounts.
- Click Accounts in the left navigation pane and select an account from the data grid.
- To delete an account, click Delete.
Caution: If you delete a parent account all child sub-accounts are also deleted except for sub-accounts shared with other companies.
- To move an account, click the Parent drop-down menu on the account's Settings tab and select a new parent account or None.