Users
Adding and assigning office locations
As an administrator, you can configure and assign office location addresses to users in your company for billing and reporting purposes. Locations can be added to an individual user or assigned to multiple users at the same time. You can also use this feature as an alternative to adding location addresses on a per user basis.
Note: Users are assigned the default company address that TT has entered, so companies with only one location do not need to enter additional office locations.
Office locations are added or modified on the Company Settings | Settings | Office Locations tab. After adding a location address as an administrator, you can assign the location to one of more users in your company on the Users | Settings tab.
Adding an office location
- Click Company Settings | Settings in the left navigation pane.
- Click the Office Locations tab and click Add.
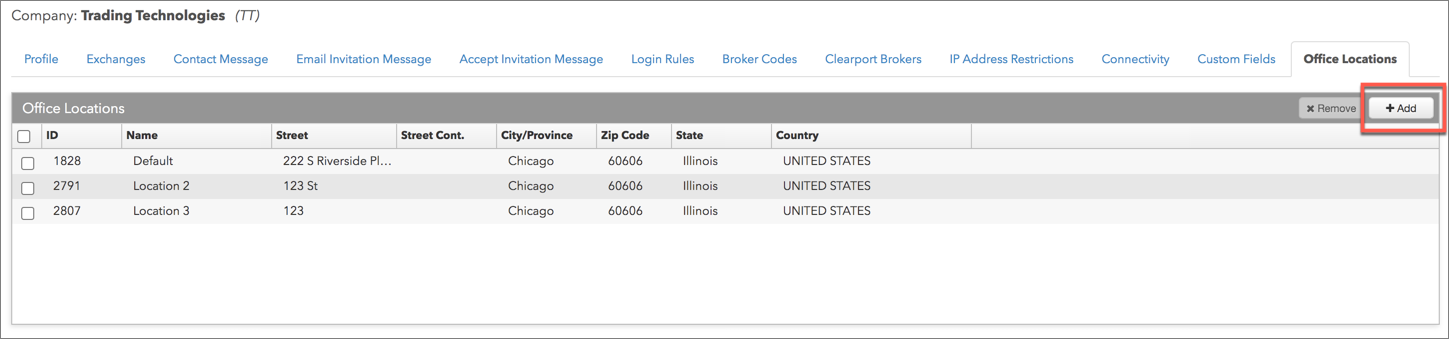
- Complete the Location Address fields and click Save Changes.
The location appears in the data grid and can be assigned on the Users | Settings tab.
Assigning an office location to a user
Note: Managed users cannot be assigned to an office location in your company. If needed, these users can continue to use their own address for billing and reporting purposes.
- Click Users | Settings in the left navigation pane and select one of more users in the data grid.
- Click the drop down menu and select an office in the Office Location section.
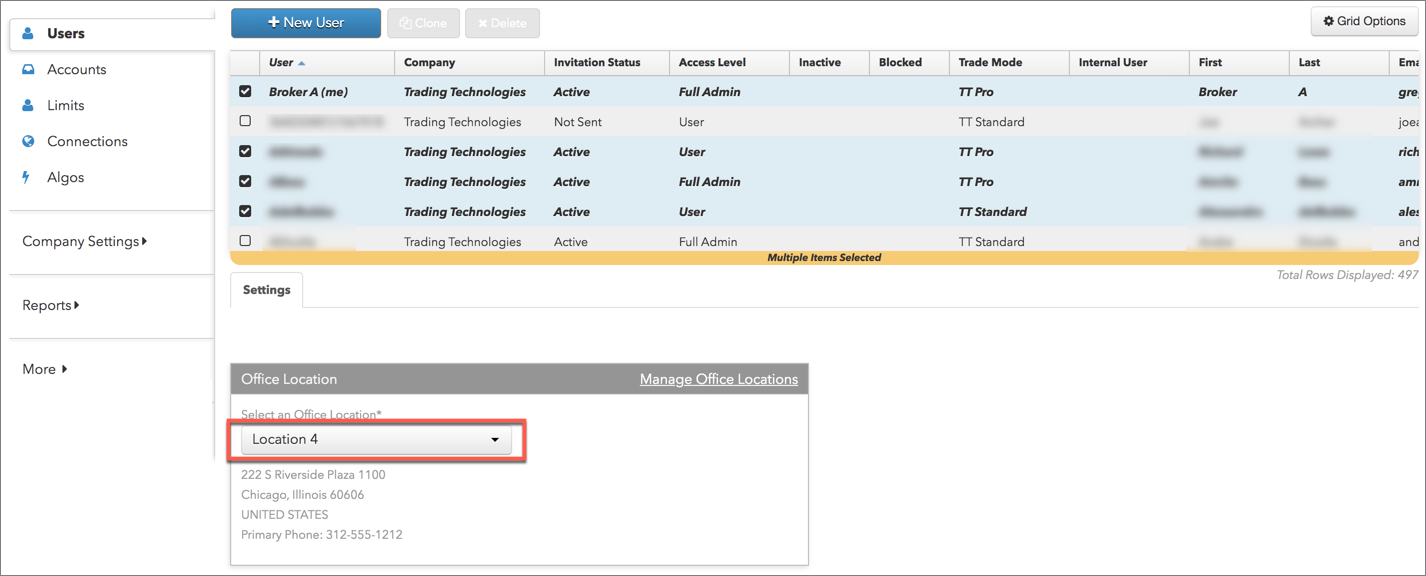
- Click Save Changes.
The location address is added. You can show the Office Location column in the data grid to view locations for each user.
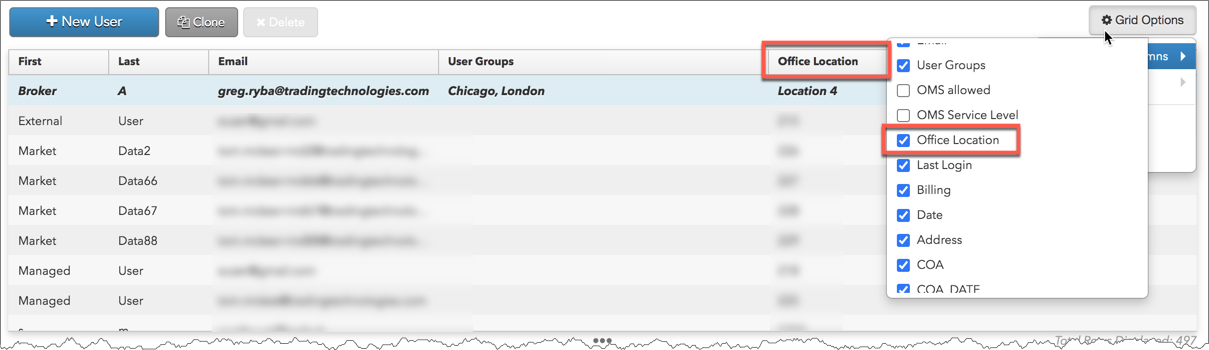
Note: This column appears in the "User Settings" report generated on the Reports tab in the left navigation pane.
Modifying an office location
- Click Company Settings | Settings in the left navigation pane and click the Office Locations tab.
Tip: You can also click Manage Office Locations in Users | Settings to open this tab.

- Modify the address in the Location Address section and click Save Changes.