Charts
Trading Schedules
The Trading Schedules widget gives you the ability to view and modify trading schedules on a per product basis. Trading and clearing session times are set per product by the exchange, and traders can view the trading hours of each instrument in the Trading Schedule widget.
The widget also gives you the ability to create, copy, and save product level custom trading schedules. You can apply the exchange's schedules or your own custom schedule to a product in an open Chart widget.
To open Trading Schedules, click Edit | Trading Schedules in the workspace menu bar.
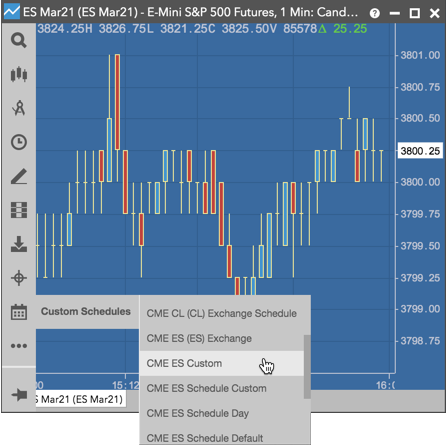
Trading Schedules Display
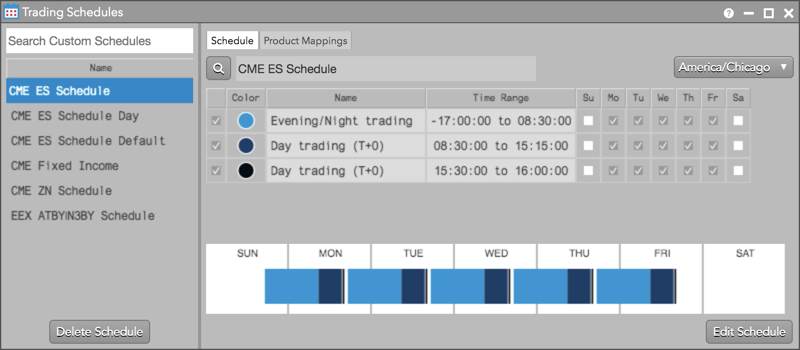
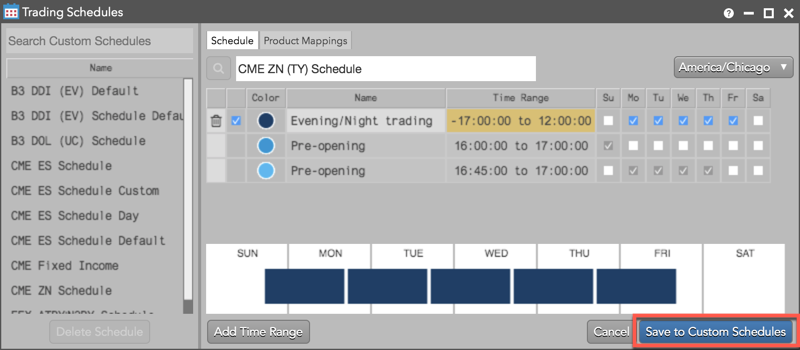
The following image shows the basic components of the Trading Schedule widget.
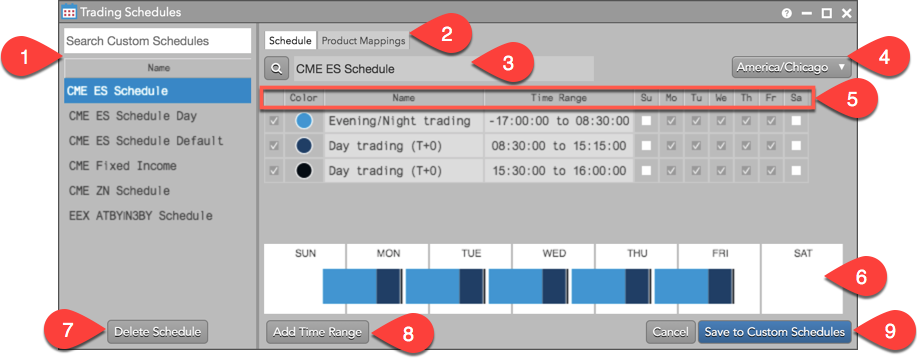
The widget includes:
- Custom schedules pane — Shows the list of saved custom schedules. Use the search box to quickly find a schedule. Saved schedules are also listed in the Chart widget when applying a trading schedule to an instrument.
- Schedule and Product Mappings tabs — The Schedule tab shows the default exchange schedule and allows you to modify time ranges, sessions active, and days active. The Product Mapping tab allows you to apply the same custom schedule to additional products.
- Schedule name — The name of the selected exchange product schedule or custom schedule.
- Timezone — Shows the timezone for the exchange sessions. The "Days active indicators" and "Time Range" columns in the widget reflect the selected timezone.
- Trading Schedule columns — The following columns are shown:
- checkboxes: Indicate if historical data for the session is displayed in the Chart widget. When a checkbox is checked, the session is "active" and data is displayed. Click the checkbox to add/remove trading session data from the Chart widget. At least one session must be active.
- Color: The color shown for the session in the "Days active indicator" at the bottom of the widget.
- Name: The name of the exchange session or event.
- Time Range: The trading hours for the session. The minus sign "-" next to the time (e.g., -15:00:00) indicates that the trading session began the previous day.
- Days of the Week: Indicates which days are reflected in the Chart widget and the "Days active indicator" for each trading session.
- Days active indicator — Shows a visual display of the days and times a session was active. Each time range for the session is color-coded as indicated by the "Color" column. The "Days active indicator" changes based on which exchange sessions are marked "active" and which timezone is selected.
- Delete Schedule — Deletes the selected custom schedule.
- Add Time Range — Adds a custom time range to the schedule. The button is available when modifying a schedule (e.g., when you click "Edit Schedule" in the lower right corner.)
- Edit Schedule/Save to Custom Schedules/Cancel — The "Edit Schedule" button allows you to edit a saved custom schedule selected in the schedules pane. The "Save to Custom Schedules" is displayed when a new instrument is added to the widget or when a saved custom schedule has been modified. The "Cancel" button deletes changes without saving.
Creating and modifying a custom trading schedule
To create a custom trading schedule:
- Click Edit | Trading Schedules in the workspace menu bar to open the widget.
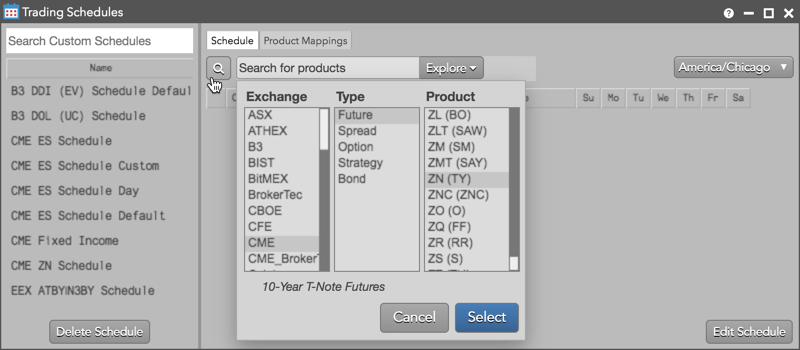
- Click the search icon in the widget to find and select an instrument.
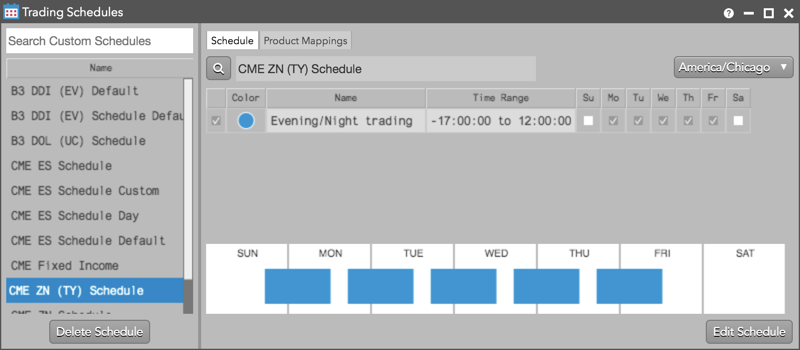
The exchange trading schedule is displayed.
Note: The "default" exchange trading schedule can also be saved in the widget.
- Customize the time range, sessions, and name for the schedule as needed and click Save to Custom
Schedules.
The schedule appears in the custom schedules pane.
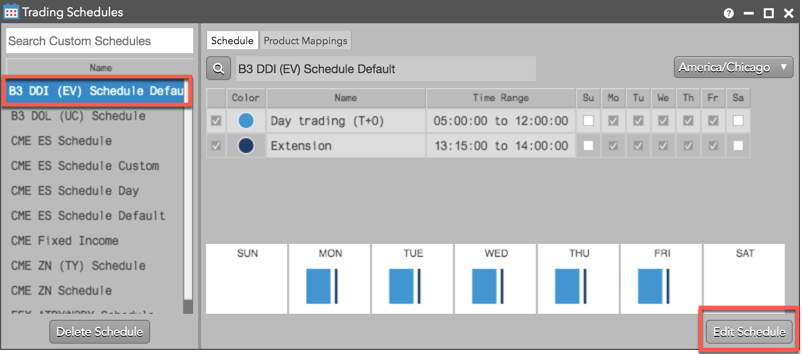
To modify a custom trading schedule, select a schedule in the custom schedules pane and click Edit Schedule. After modifying the schedule, click Save to Custom Schedules.
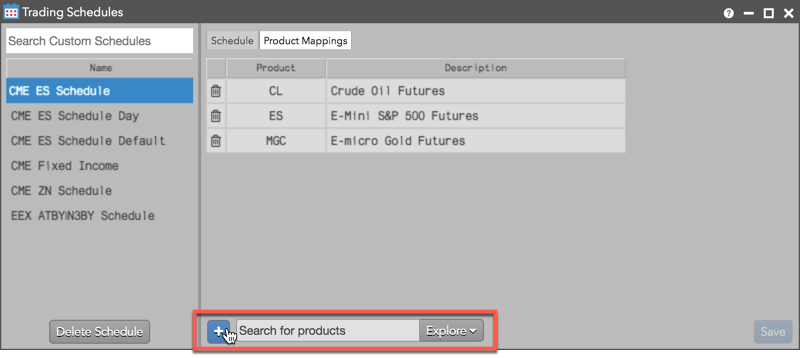
Trading Schedules Product Mapping
The Product Mappings tab gives you the ability to apply your custom schedule to other products. When you open a Chart for a product that is mapped to a custom schedule, the Chart shows trading data based on the custom schedule by default instead of the exchange schedule for that product.
To map products to a custom schedule, click the Product Mappings tab and click the "+" button to search for and select a product. After adding the product(s), click the Save button.
To remove a product mapping, click ![]() next to the mapping and
click "Save". When the product mapping is deleted, the Chart automatically shows the trading data for the product
based on the exchange schedule.
next to the mapping and
click "Save". When the product mapping is deleted, the Chart automatically shows the trading data for the product
based on the exchange schedule.
Note: Autospreader instruments cannot be mapped as a product to a custom schedule. A custom schedule can be applied to an Autospreader instrument when it's displayed in an open Chart widget.
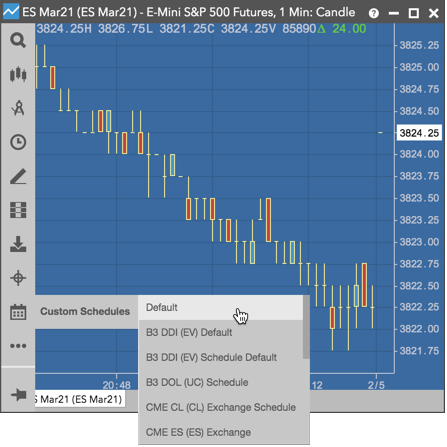
Applying exchange and custom schedules
To apply an exchange or custom schedule to an instrument, open the
menu in the Chart widget and click ![]() to select the schedule.
to select the schedule.
In the Chart, schedules can be applied to all exchange-traded instruments as well as synthetic Autospreader and Aggregator instruments. When you apply an exchange schedule or custom schedule to an instrument in the Chart widget, the chart shows the historical trading data for the instrument based on the sessions and days active in the schedule.
To reapply the default exchange or custom schedule for the product, click ![]() and
select "Default".
and
select "Default".
Note: Custom schedules do not apply to continuation charts.