Monitor
Managing Alarms
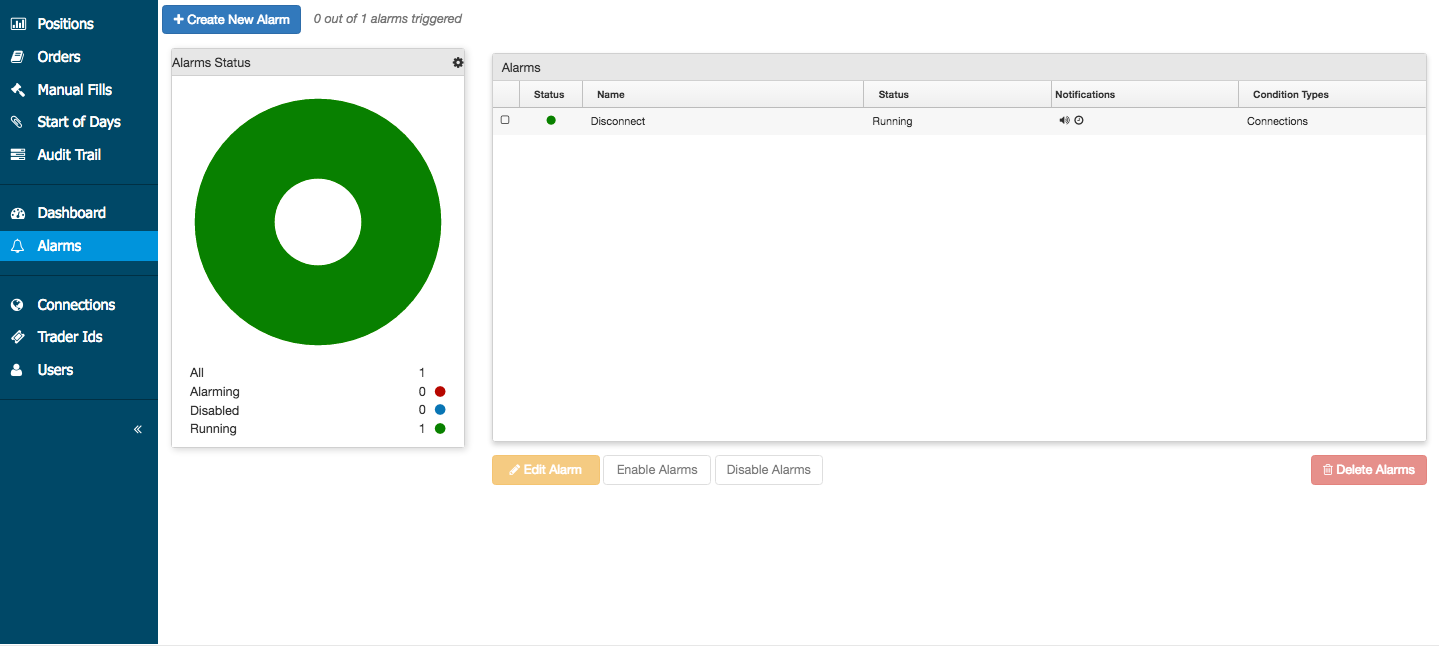
Click Alarms in the left navigation to open the Alarms Status page. Use the Alarms page to create, enable, view, and manage alarms for users, trader IDs, and connections. This page also displays details for all alarms in the Alarms section. From this section, you can view and manage alarms for your company.

Creating a new alarm
A new alarm can be created on the Alarms page. Click Alarms in the left navigation pane to begin creating a new alarm.
To create a new alarm...
- Click + Create New Alarm at the top of page.
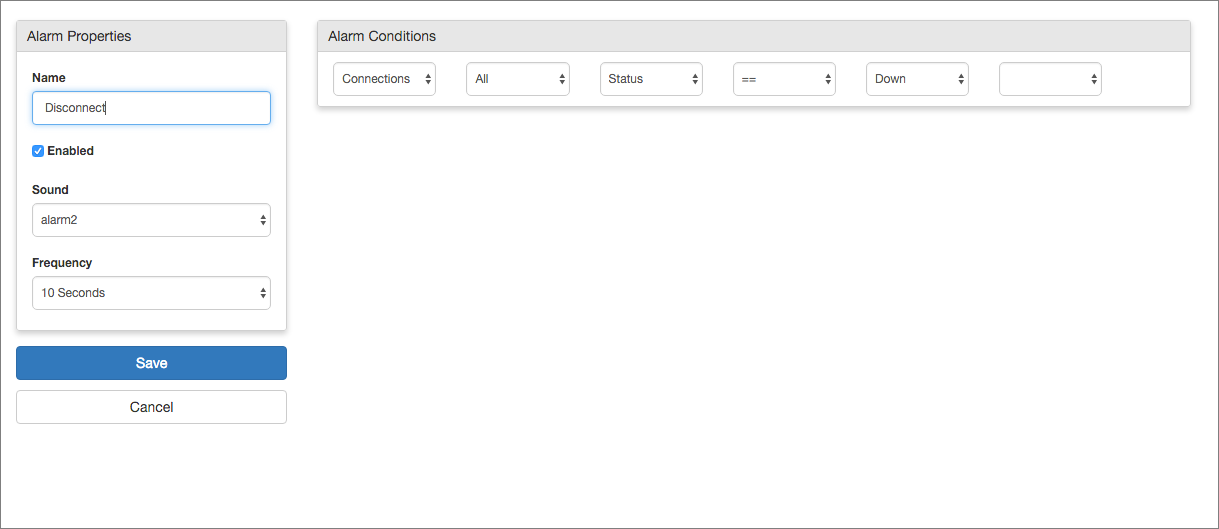
- Enter the Alarm Properties.
Enter the Alarm Conditions.
Click each field to select an alarm type and condition. The conditional statement "==" means "equals" and "!=" means "not equals".

- Click Save in Alarm Properties. The saved alarm appears in the Alarms section.
Managing alarms
In the Alarms section, you can enable, disable, modify, or delete all active or inactive alarms.
To enable an alarm...
- In the Alarms section, select an inactive alarm.
- Click Enable.
To disable an alarm...
- Select an active alarm.
- Click Disable.
To modify an alarm...
- Select an alarm.
- Click Edit.
- Modify the alarm conditions as needed and click Save.
To delete an alarm...
- Select an alarm.
- If the alarm is active, click Disable.
- Click Delete.
Viewing alarm status
In the Alarm Status section, click on a listed status to display the alarm details in the Alarms section. You can hover on a alarm in the Alarms section and click the mail icon to send an email message to the user via your default email application.
The circle graph in the Alarm Status section displays the selected status at the center of the graph. Click a color in the graph to display the status in relation to all other statuses. All alarms are represented at the center of the graph.
Note: Each status is color-coded in the dashboard. In the Alarms dashboard, you can change the colors assigned to a connection status by clicking the gear icon in the upper right corner of Alarms Status to display the Alarm Status Settings.