Risk Administration
Scheduling automated data uploads
As a company administrator, you can use the Auto Uploads tab to schedule recurring, automated data file uploads. The uploads can be scheduled to occur at the days and times that best suit your company's business needs.
On the Auto Uploads tab, you can schedule uploads for:
- Account credit files
- Start of Day (SOD) records
- Product margin files
- Account cash balance
- Inter-product margin files
- Trayport Market Activity File (TT Score)
- Generic Audit Trail File (TT Score)
Note For specific information on configuring uploads for TT Score files, refer to the Data File Upload section of the TT Score help.

When creating a schedule, you can set the time (UTC) and days of the week that the upload will run, as well as:
- Select a file format
- Schedule retry attempts
- Select a secured FTP site as the source of the data upload
- Modify existing upload schedules
- Schedule multiple uploads
- View results of the uploads
To schedule a new automated upload:
- Click Company Settings | Auto Uploads in the left navigation pane.
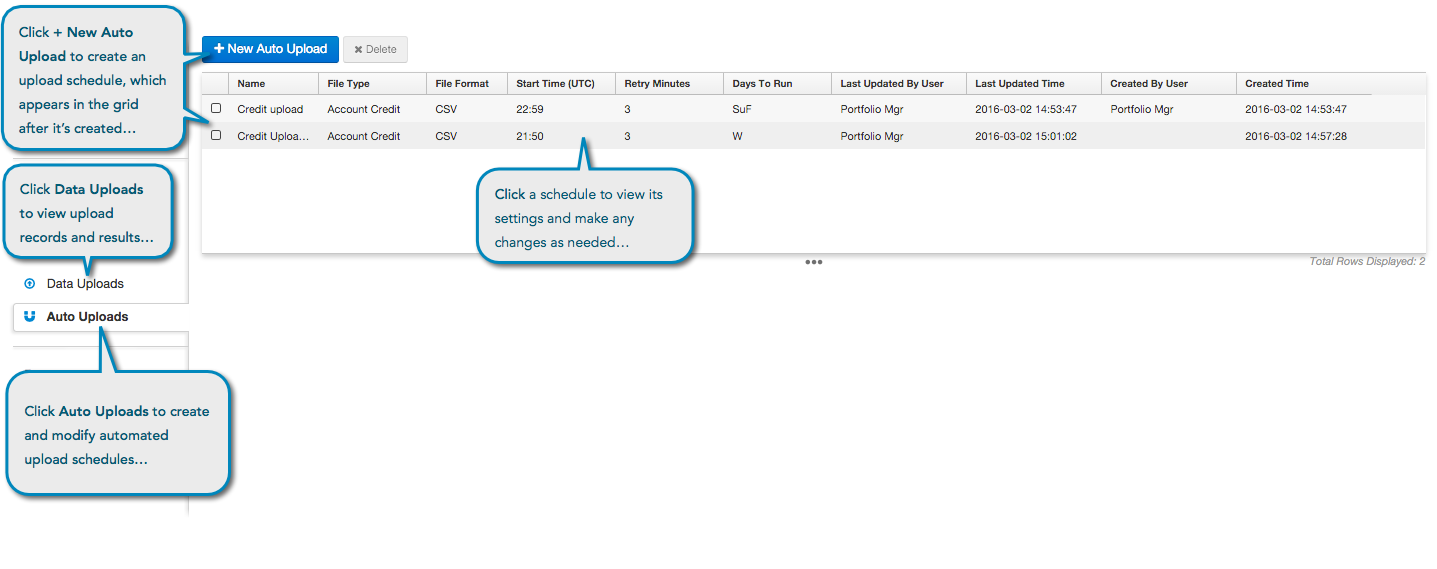
- Click + New Auto Upload.
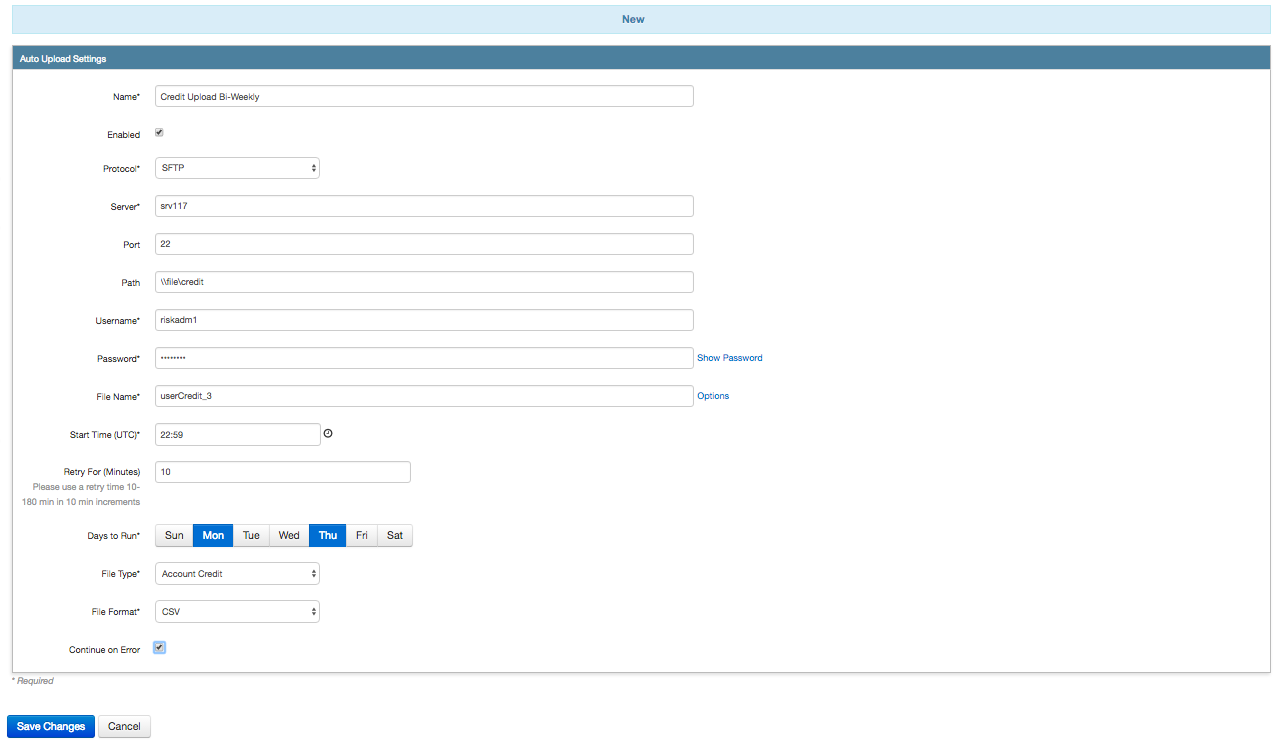
In the Auto Upload Settings screen, configure the following (all settings are required unless noted):
- Name — Enter a name for the scheduled upload. When adding multiple schedules, each name must be unique.
- Protocol — Select a protocol to use for uploading the data (e.g., SFTP).
- Server — Enter the server hostname that is the source of the data upload. The SFTP port is automatically set to "22."
- Path — Enter the path to the file being uploaded from the server. This field is optional.
- Username — Sets the username for logging in to the server.
- Password — Sets the password for logging in to the server.
- File Name — Enter the name of the file being uploaded.
- Start Time (UTC): — Sets time at which to upload the file to TT. Enter a time in UTC in the hh:mm format (e.g., 23:59).
- Retry For (Minutes) — Sets how long to wait before retrying the upload. Enter a time in minutes.
- Days to Run — Select which days to run the automated upload.
- File Type — Select the file type (e.g., Credit).
- File Format — Select the format for the selected file type.
- Continue on error — When this option is checked (enabled), Setup stops logging after 20 errors, but continues to upload the file. When it is unchecked, Setup stops uploading data once it logs 20 errors. This option is unchecked (disabled) by default.

Click Create.
The schedule appears in the Auto Uploads grid at the top of the screen.
Results of the upload are stored in Data Uploads.
Viewing automated upload results
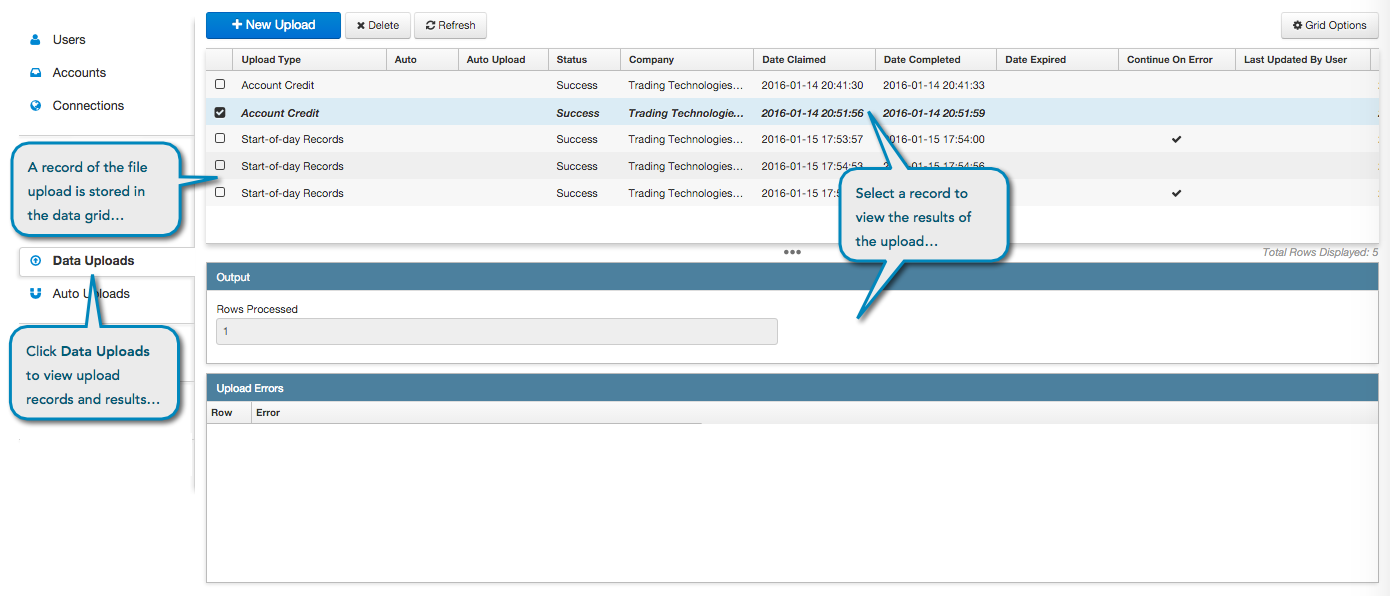
After the scheduled upload runs, the Setup application displays the results and stores a record of the file upload on the Data Uploads page. Click Data Uploads in the left-navigation pane to view a log of the results.

To view automated upload results...
Click Company Settings | Data Uploads in the left navigation pane.
A record of the uploaded file and its status appears in the grid.
-
Click the checkbox next to a record in the grid to review the Output section, which displays how many rows of the file are processed. Any errors that occurred during the upload appear in the Upload Errors section on this page.
Note: If there are multiple rows in a credit file, the last row will overwrite the first.
Modifying an automated upload schedule
- Click Company Settings | Auto Uploads in the left navigation pane.
Select a schedule in the grid.

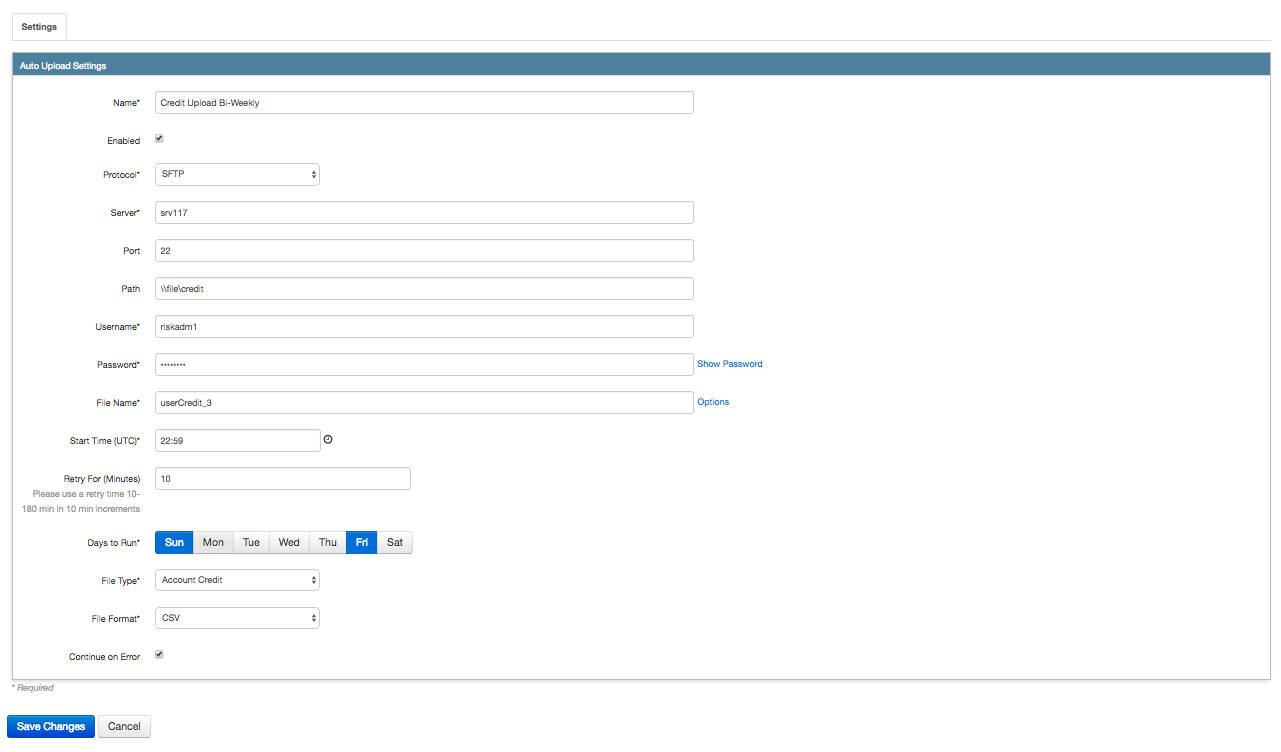
The schedule settings appear in the Auto Upload Settings screen on the Settings tab.

- Modify the settings as needed and click Save Changes.