Account Administrators
Adding an account administrator
As a company administrator, use the Users | Account Administration tab to configure the account administration permissions for supporting the separate roles in your firm (e.g., risk administration, account setup, etc.). The accounts managed by the account administrator are also assigned on this tab.
When selecting users as account administrators, consider the following:
- The account administrator can be a user who is a direct employee or a user who is managed by or shared with your company.
- A user can only be an account administrator in one company.
When assigning accounts to an account administrator, consider the following:
- You can assign or remove the accounts you have access to.
- The same account can be assigned to multiple account administrators.
- When a parent account is assigned to an account administrator, all sub-accounts (existing and new) of that parent account are also assigned. When the parent is removed, all sub-accounts are removed.
- Account administrators will not be able to the view accounts they are managing in the Trade application unless the accounts are explicitly assigned to the account administrator on the Users | Accounts tab.
To add an account administrator:
- Click Users in the left navigation pane.
- Select a user in the data grid and click Account Administration.

- In the Administrative Permissions section, configure the account administrator permissions.

The permissions are:
- Enable — Allows you to enable each permission.
- Restrict Account Administrator access to User Groups — Allows the account administrator to only assign users belonging to the same user group(s) that they are also assigned to. If unchecked, account administrators can assign all users in the company, as well as users shared with the company. This option is unchecked by default.
- Enable/Disable Trading — Allows the account administrator to enable trading for accounts they are managing. When the "Enable/disable trading" option is unchecked, the administrator cannot enable/disable trading on the accounts.
- Update account position settings — Allows the account administrator to set the account position reset time, automatic SOD functionality, and daily credit limit.
- Assign Users — Allows the account administrator to assign users to the accounts they are managing.
- Assign Connections — Allows the account administrator to view and assign connections to the accounts they are managing, but they cannot create new connections. When unchecked, an account administrator cannot view or assign connections.
- Manage Sub-Accounts — Allows the account administrator to create and manage sub-accounts for the accounts they are managing.
- Add and Edit Account Limits — Allows the account administrator to create and manage position risk limits for the accounts they are managing. When this setting is unchecked, the administrator cannot check or uncheck the Accounts | Limits | Apply Limits checkbox and cannot add or modify position limits.
- Add and Remove Account Restrictions — Allows the account administrator to restrict users from manually updating positions on the account or using the account to submit certain order types. When unchecked, an account administrator cannot use the Account | Restrictions tab. When checked, it also allows the account administrator to enable/disable order permissions for users assigned on the Accounts | Users tab.
- Manage Order Tags — Allows the account administrator to create and verify order tag defaults for the accounts they are managing.
- In the Accounts section, click Add.

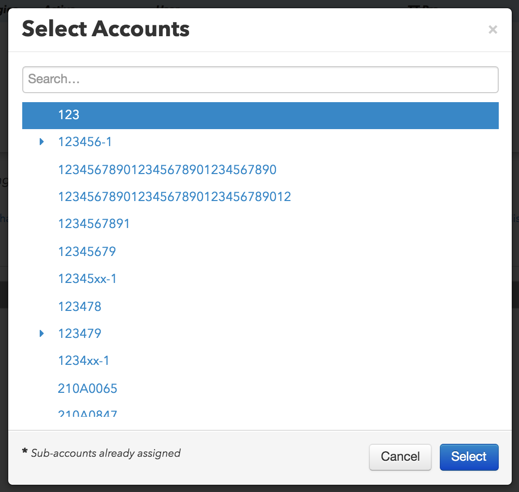
- In the Select Accounts screen, click each account and click Select.

The account is added and can be managed by the account administrator.

Note: To remove an account, select it and click Remove.
- Optionally, click Add in the Accounts section to select and the profiles that the account administrator can manage in Setup.
Note: Only profiles with accounts managed by the account administrator are available for selection.
- Click Save Changes.