Order Ticket
Submitting an order
--- widget: ot layout: task-tab title: Submitting an order AccordionID: ot-submitting-an-order ---To submit an order from Order Ticket:
-
Open an Order Ticket.
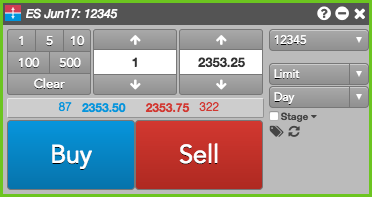
- Enter the order quantity and price.
- Select the account, an order type, and TIF settings. Note that the list of order types can vary based on the exchange.
-
If the selected order type requires additional information (e.g., Iceberg), provide the value.
Note: If you select a TT Order type or custom algo order type, enter the additional information in the embedded panel. Based on the TT Order type, the panel might include tabs for additional parameters. For example, the following shows a fly-out dialog for a TT Bracket order type.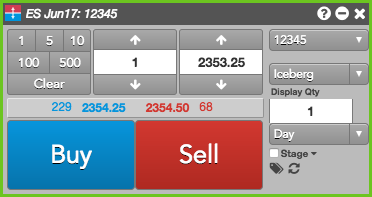

Note: You can click
 to display the available templates and
  to display all of the parameters in a flyout.
For quicker access to order templates, you can display the template selector by enabling Algo templates from the Show/Hide context menu.

-
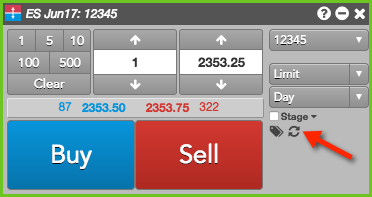
Optionally, click the tag icon to show and enter data in the free-form text fields.
These fields may be populated by default with user order-routing exchange properties from the Setup application. The usage of these free-form text fields varies by exchange. Tip: As needed, you can click the reset icon to reset the order ticket to its default settings.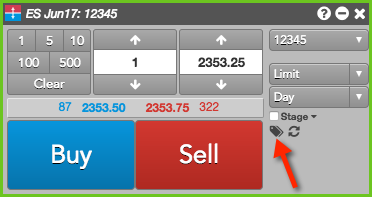
- Click Buy or Sell to submit the order.
Customizing order quantity buttons
To customize order quantity buttons:
- While pressing the Ctrl key, right-click in the order quantity number pad buttons. The order quantity button interface opens.
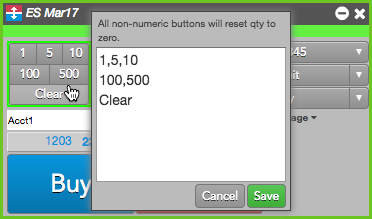
- Change an order quantity in the interface. The value immediately changes on the corresponding number pad button.
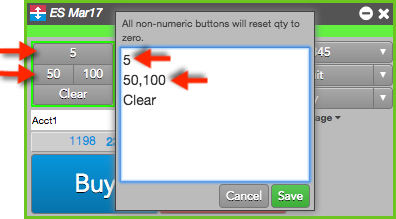
- Click Save.
Order Ticket Price Increment Buttons
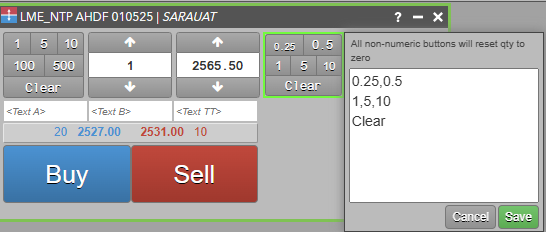
- The Order Ticket provides a set of optional buttons to quickly adjust the price of an order. A Show/Hide right-click menu item named "Price Increment Buttons" enables the buttons, which then appear immediately to the right of the main price input control.
- The price buttons behave similarly to the order quantity buttons, e.g., left-click increments the price, right-click decrements the price. The button values represent the number of price tick increments of the instrument or decimal precision multiples of the instrument's point value, and can be configured as positive integers only. Ctrl + right click on these buttons brings up a dialog to configure the button values.
- To define how the Order Ticket price increment buttons adjust the price values of a selected instrument either by (1) integer tick increments of the instrument, or (2) decimal precision multiples of the instrument's point value, go to the Order Ticket settings and select Instrument Tick or Point values.
Submitting new orders on hold
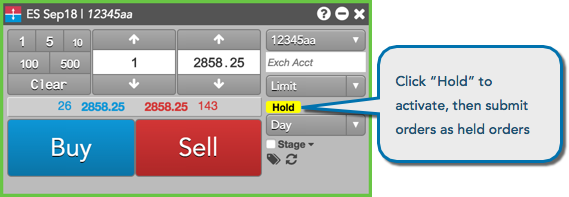
Optionally, you can submit new orders as held orders, then resubmit the orders from the Order Book at a later time. To enable this functionality, right-click on the widget and check the Show held-order toggle setting. You can also make this the default setting to submit all orders on hold. After you click Save, the Hold button is shown on the widget.
New orders can be submitted as held orders for the following natively supported order types, which vary by exchange and product:
- Limit
- Iceberg
- Market to Limit
- Stop Limit
- Stop Market
In addition, new orders for all TT Order Types can be submitted as held orders and resubmitted at a later time.
To submit an order as a held order, click the Hold button, then submit the order. The Hold button is highlighted yellow when it's active. When active, all newly submitted orders are sent to the exchange "on hold" and appear in the Order Book widget with a status of "Hold" in the Status column.
Submitting a staged order
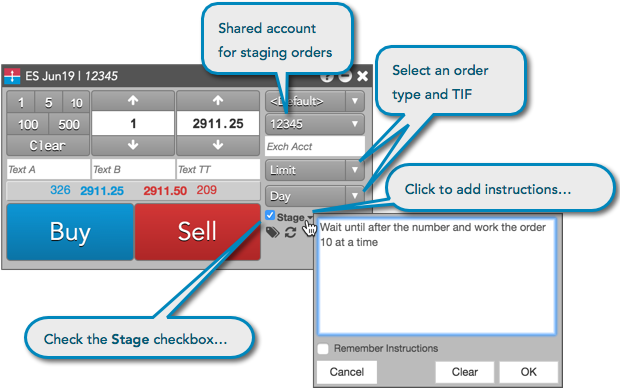
To submit a care order:
-
Open an Order Ticket for a contract.
-
Enter the account, price, quantity, order type, and TIF order restriction.
-
Check the Stage checkbox.
Note: If you submit staged orders on a regular basis, this box can be checked by default if the Staged column is checked for the profile you are using.
-
Optionally, click the drop down arrow next to the Stage checkbox to enter any additional instructions. You can also click Remember Instructions to save the instructions in the Order Details screen.
-
Click Buy or Sell to submit the order.
The order appears in the Order Book with a Status of Available.
Creating Admin and Local Manual Fills
Manual Fills
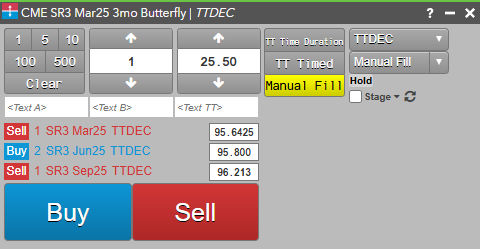
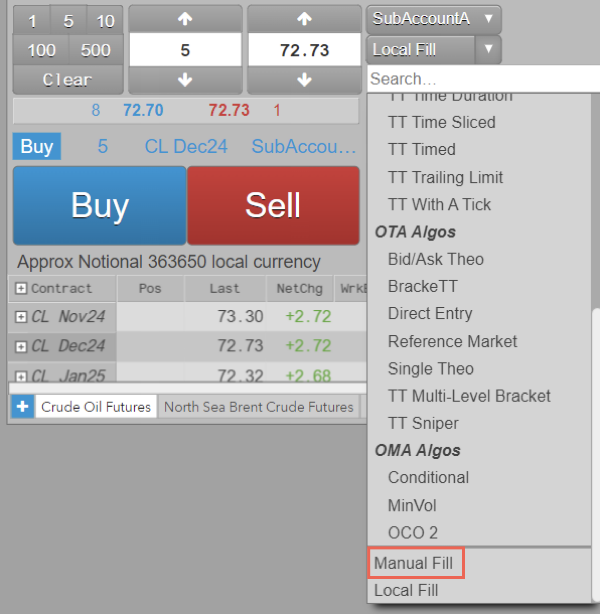
A manual fill record typically represents a position obtained outside of the TT system. Using Order Ticket, you can manually add fills to more accurately manage overall positions per account. Manual fills created from order entry widgets are always sent as Admin manual fills. To add these fills, user permission to update positions on the account is required.
Note: Once a manual fill is published, it cannot be changed. However, it can be offset with another manual fill.
Manual (Admin) Fills
When you click Manual (Admin) Fills to create a fill and click Publish, the Order Ticket generates the manual fill record, and all traders using that account can view the fill. The published manual fill is viewable in the Fills and Positions widgets of all users sharing the account, and is used in risk limit calculations for the account. These fills appear in the Fills widget with a status of "Admin" in the ManualFill column.
Staged Order Manual Fills on MultiLeg Spreads
When using the Order Ticket to create a manual fill on the parent spread order:
- When the spread price is changed, the last leg price will automatically get adjusted appropriately.
- When an individual leg price is changed, the spread price will automatically get adjusted appropriately, while the other leg prices remain the same. This feature is available only when creating manual fills on staged spread orders.
