NFI
Configuring user access to NFI
To configure user access to NFI:
- Click the Users | Exchanges tab for a user selected in the data grid.
- Click the exchange list drop down arrow, and scroll to and select an exchange.
- Click the Subscriber Market Data, FIX Market Data and Order Routing tabs to configure the user for the selected exchange:
- Use the Subscriber Market Data tab to allow or deny the user access to all market data per product group.
- Use the Order Routing tab to configure exchange credentials for user identification.
- Use the FIX Market Data tab to allow or deny the user access to all market data through TT FIX per product group.
- Configure the following Order Routing settings:
Order Routing — NFI exchange settings per user: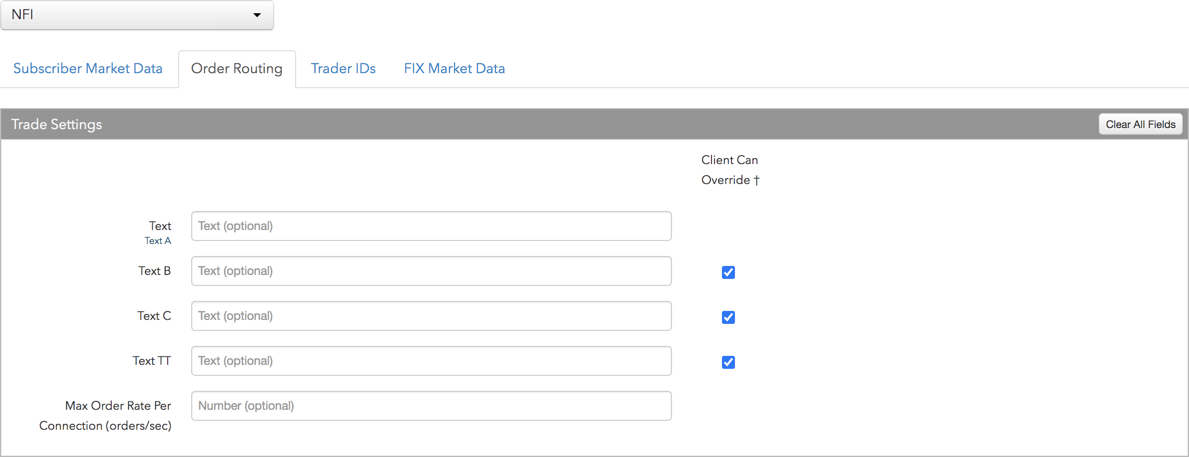
- Text — An optional, user-defined text value that is routed to the exchange for clearing and back office purposes. Maps to FIX Tag 58. Alpha-numeric and special characters are allowed.
- Text B — An optional, user-defined text value that remains on submitted orders in the TT system, but is not sent to the exchange. Alpha-numeric and special characters are allowed.
- Text C — An optional, user-defined text value that remains on submitted orders in the TT system, but is not sent to the exchange. Alpha-numeric and special characters are allowed.
- Text TT — An optional, user-defined text value that remains on submitted orders in the TT system, but is not sent to the exchange. Alpha-numeric and special characters are allowed.
- Max Order Rate Per Connection (orders/sec) — Sets the maximum number of orders per second that a user can enter per connection. This limit cannot exceed the exchange-defined order rate maximum.
- Client Can Override — Sets whether the user can override the value in this field when submitting an order. Check the check box to allow a user to override the value. When unchecked, the field is locked and the user cannot change it.
-
Click the Subscriber Market Data tab to allow or deny access to All Market Data available at the exchange.
If Allow is enabled, click Sessions to set how many simultaneous market data sessions the user can have active using different IP Addresses/Applications. Selecting 0 - Delay Only indicates that the product group is denied in all environments except the delayed environment, which does not have access to real-time market data.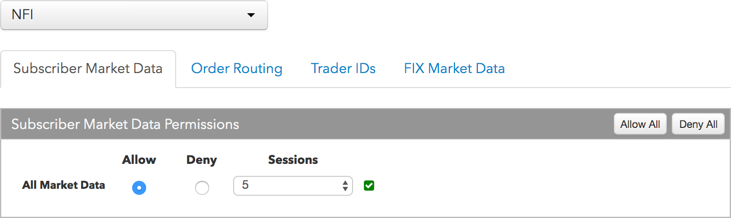
Note: Any product groups that are disabled have not been authorized for your company. Please contact a Trading Technologies representative to enable them.
For exchanges that require market data agreements, the following indicators are displayed next to the "Sessions" field:
 — Indicates the market data agreement has been approved.
 — Indicates the market data agreement is outstanding or pending approval.
Tip: Click a market data indicator to open the Agreements tab.
-
Click the FIX Market Data tab to allow or deny FIX Users access to All Market Data available at the exchange.
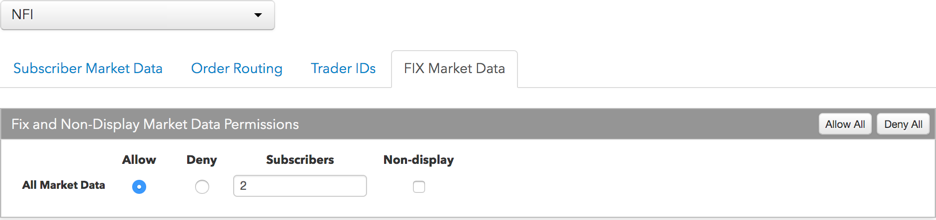
If Allow is enabled, click Subscribers to set the number of users viewing the market data behind the FIX feed.
If the FIX feed is for non-display purposes (e.g., black-box algorithm, program for calculating P/L, etc.), select Allow, set subscribers to 0, and check Non-display.
Note: Any product groups that are disabled have not been authorized for your company. Please contact a Trading Technologies representative to enable them.
-
Click the Trader IDs and click an entry in the Trader ID column of the table to add a user-defined ID.
Trader IDs are added by configuring the following settings on the More | Trader IDs tab in the left navigation panel:
- Trader ID — Sets the exchange-provided trader ID that overrides the exchange-provided Default Trader ID on the connection. Sent to the exchange as Tag 50. This field is a required field.
- Password — Sets the exchange-provided session login password that overrides the password on the connection. Sent to the exchange as Tag 554. This is a required field.
Trader IDs are provided by the exchange. Any trader IDs that are added for your company must be configured on the Trader Ids tab. This value will override the exchange-provided trader ID on all order orders sent to the exchange.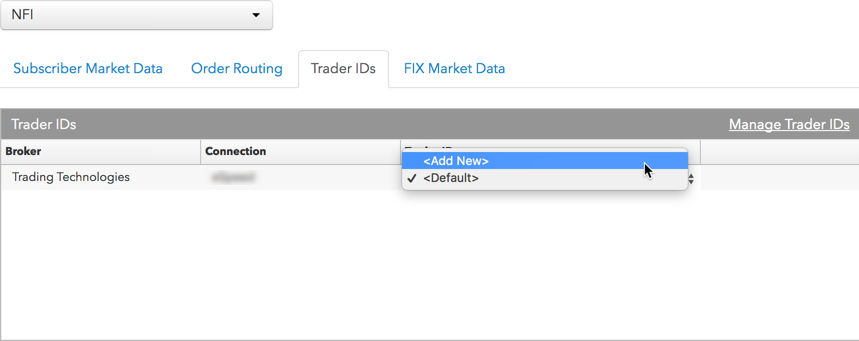
- Click Save Changes.