Order Book
Modifying orders in the Order Book
Using the Order Book widget, you can change the price, quantity, account, order type, or
time-in-force of a working order. Simply select an order, modify the order as desired, and click  .
.
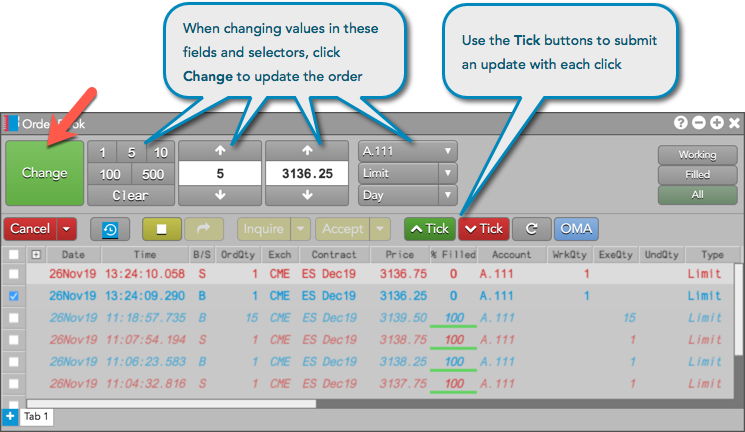
You can also raise or lower the price on an order by ticks by clicking the  and
and  buttons. When you use these buttons,
the changes happen immediately.
Note: When you select multiple orders, most buttons would grey out and only these are available for modifying the selected multiple orders: Cancel, Hold/Submit, Tick Up and Tick Down buttons. If all of the selected orders are of the same order type, you can also modify the following fields: Price (including Price Payup), Time-In-Force (TIF) and TextTT.
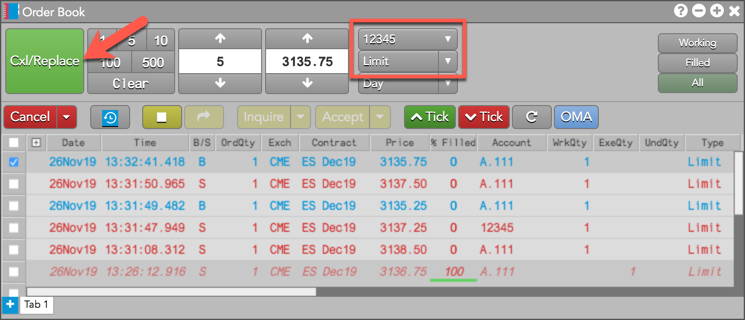
If the modification requires that you cancel/replace the working order, the Change button displays as  and indicates the order will lose its position in queue. The
Cxl/Replace button is displayed when you modify the following:
- account
- order type
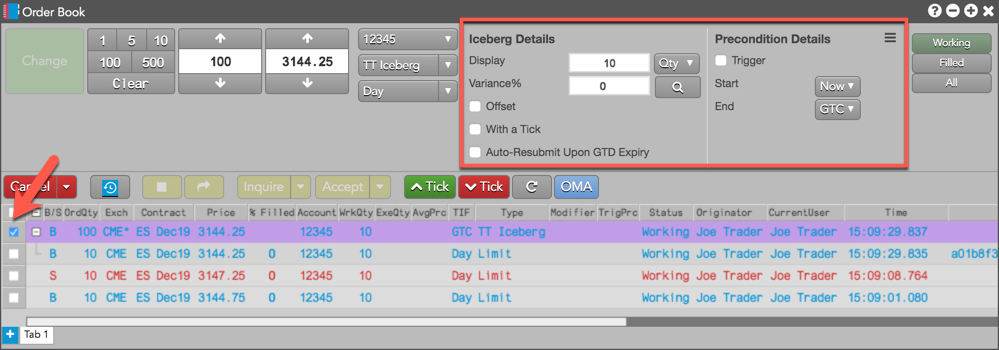
When selecting a working parent order for a TT Order Type, you can make changes to the parameters for the selected order type directly from the Order Book.
Modify Orders Using Multiple Floating Order tickets The Order Book provides an "Edit order..." right-click context menu on working order rows. This menu item launches a floating order ticket with a single green "Change" button. This feature can be invoked on multiple orders, allowing you to queue up edits for several orders and then individually submit them when desired.
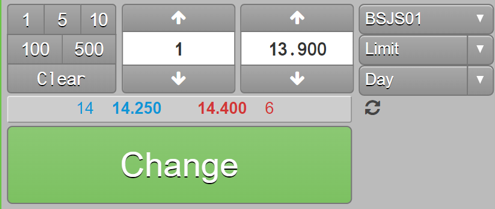
FX Spot Quantity Button
When trading FX Spot instruments, the order quantity controls include a FX Spot Quantity button that allows you to quickly set the numeric quantity to equal the value in thousands (K), millions (M), or the numeric value (blank). Simply click the FX Spot Quantity button to cycle through the options.
Modifying an order in a grouped Order Book
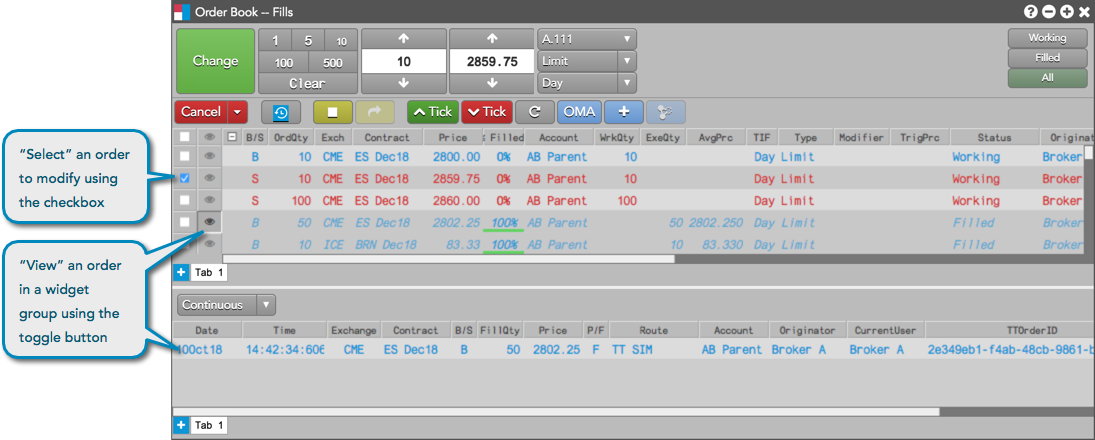
When an Order Book is part of a widget group, the  toggle button is
displayed in the "view" column for each order row. The button is used for "viewing" filled and partially filled
orders in a grouped widget. When the toggle button is displayed, the checkbox is used for "selecting" an order to
modify or cancel in the grouped Order Book.
Changing the current user on an order
The CurrentUser column identifies who is monitoring an order while it's working in the market. When orders are entered by multiple users sharing the same account, this column identifies the user who "last touched" an order.
When you select an order in the Order Book and click the "Current User" button in the Order Toolbar, your alias is displayed in the CurrentUser column. The button is shown by selecting Settings: Order Book | Set Order Toolbar buttons in the right-click context menu.

Modifying the clearing account for an order (ASX only)
In the Order Book or orders pane of the Order and Fills widget, you can change the clearing account for working orders and partially or fully filled orders on ASX.
Note: To modify the clearing account, ensure that the Show Exchange Clearing Account edit box setting is enabled in Preferences | Orders.
To modify the clearing account for an order:
- Select the order in the Order Book or orders pane.
- Click the Exchange Clearing Account edit box in the control panel and select an account in the drop down menu.
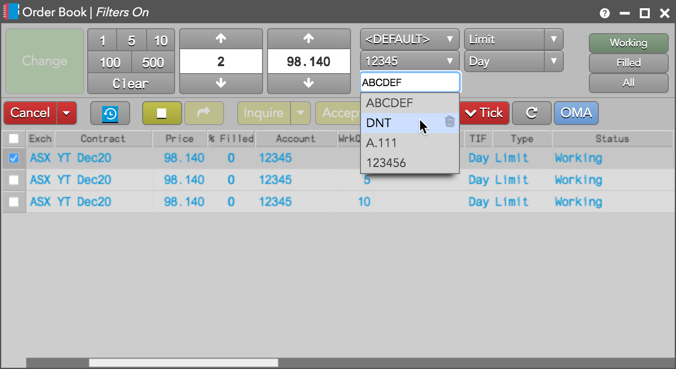
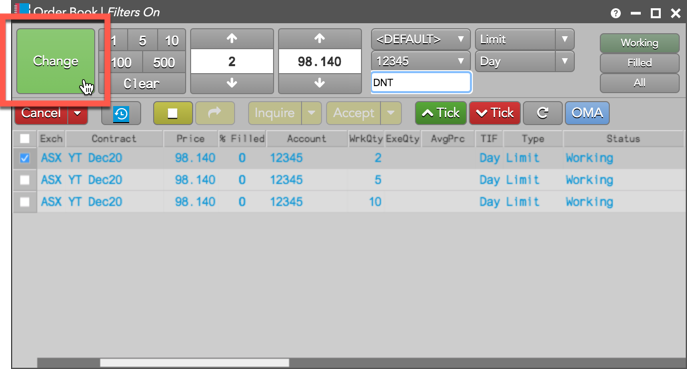
- Click Change to modify the clearing account on the order.
Customizing order quantity buttons
To customize order quantity buttons:
- While pressing the Ctrl key, right-click in the order quantity number pad buttons. The order quantity button interface opens.
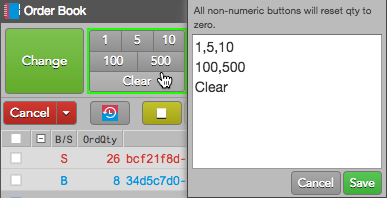
- Change an order quantity in the interface. The value immediately changes on the corresponding number pad button.
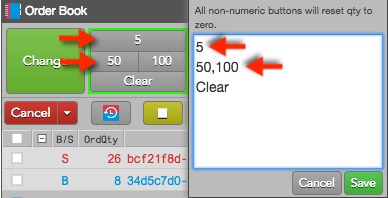
- Click Save.
Modifying Multiple Algo Parameters for Working Child Algo Orders
When multiple working algo orders of the same order type are selected in the Order Book, you can modify all parameters applicable to that order type in bulk.
- Select multiple working child algo orders.
- Right click on the selected orders and select Open > Algo Dashboard, which opens an Algo Dashboard widget seeded with the selected algo orders.
- The parameters applicable to that order type appear in the adjacent Algo Parameters pane, pre-filled with the current values on the orders. Parameters set to different values will display as blank. After making desired adjustments to the parameters, click Submit to update all selected orders in bulk, with each order adjusted accordingly.