Excel integration with TT
Installing and enabling the Excel add-in
To download and install the Excel add-in:
-
Log in to TT, and open a workspace.
-
From the File menu, open the Excel sub-menu and select Download Excel Add-In.
Note: Based on your browser settings, the browser might automatically save the file to a pre-configured folder, ask you to save the file, or ask you to run the program. If you choose to run the program from your browser, skip the next step.
-
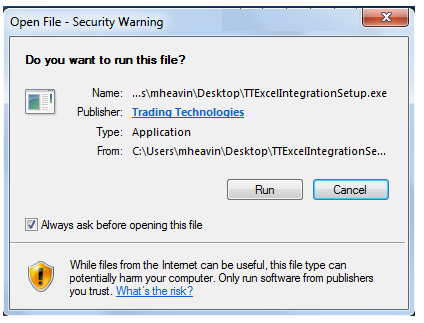
Launch the TTExcelIntegrationSetup.exe application.
The following dialog is displayed.
-
Click Run.
If Microsoft .NET Framework 4.6 is not already installed on your system, the following dialog is displayed.
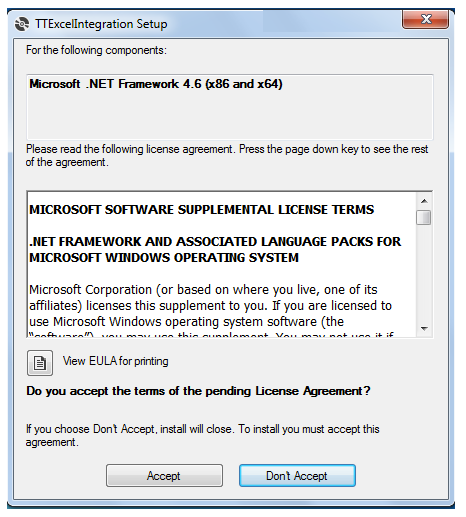
Click Accept to install the framework.
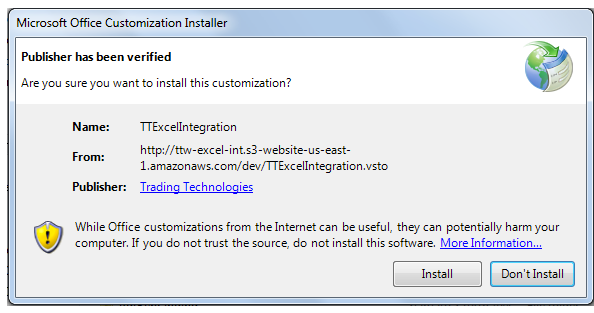
The Microsoft Office Customization Installer dialog is displayed.
-
Click Install.
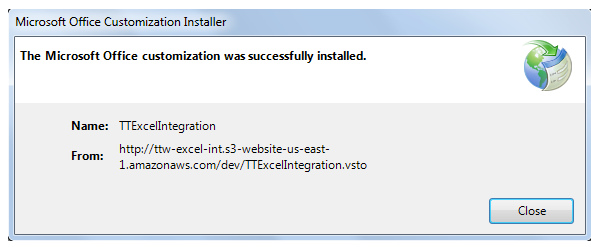
When the installation finishes, the following dialog is displayed.
-
Click Close.
Note: In some instances, the installation of .Net 4.6 will fail with a Visual Studio Tools for Office Solution Installer error dialog. If you see this error dialog, try the steps described in If the .NET installation fails.
Enabling the Excel add-in
To enable the TTExcelIntegrationSetup add-in in Excel:
-
Start Excel.
The following dialog is displayed.
Note: The dialog might be obscured by the Excel window, so you might need to collapse or move the Excel window to see the dialog.
-
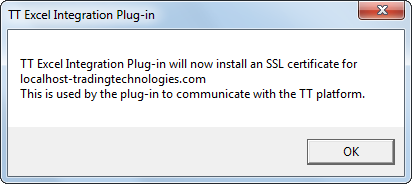
Click OK.
The following dialog is displayed.
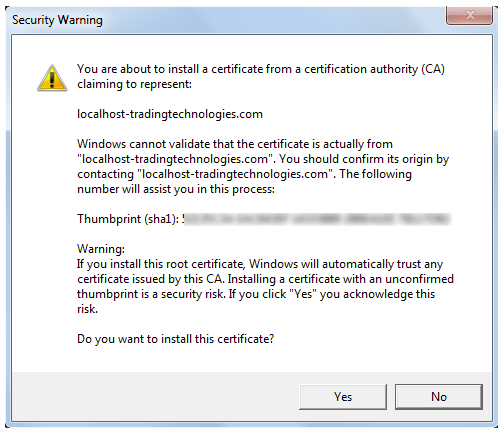
-
Click Yes to install the security certificate.
-
If you use Windows Firewall, you might need to configure network access in the following dialog.
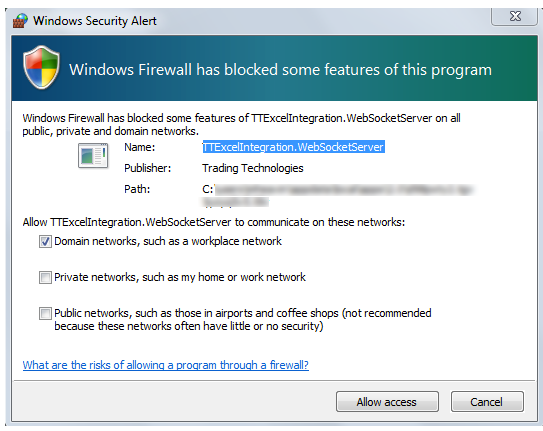
Click Allow access.
-
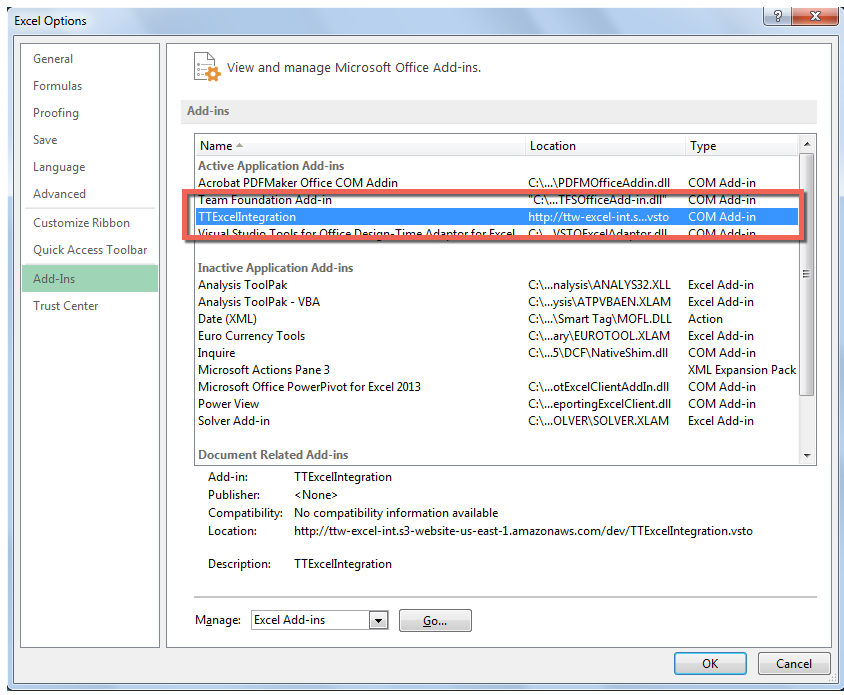
Optionally, to verify the add-in installed successfully, open the Excel Options, select Add-Ins, and confirm the list includes TTExcelIntegration, similar to the following:
Uninstalling the TT Excel integration add-in
To uninstall the TT Excel integration add-in, open the Windows Programs control panel and remove TT Excel Integration.