Risk Administration
Uploading an account credit file
As a Company Administrator, you can use the Data Uploads page to upload account credit data from one of the following file formats:
Each credit file format includes your company's account numbers, currency, and available credit or cash balance. When uploaded, the Setup app reads the values of the file and assigns the credit limit to accounts in your Company. Credit files can be uploaded to parent, child, or shared accounts as long as they are owned by your Company.
To upload an account credit file...
- Click Company Settings | Data Uploads in left navigation pane.
- Click + New Upload.
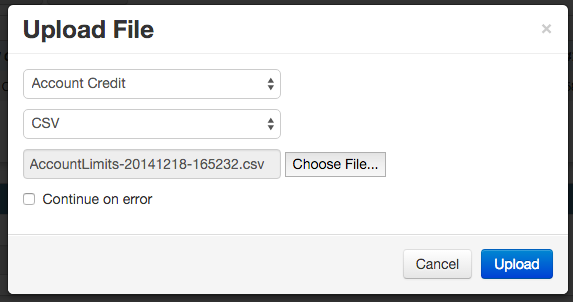
- In the Upload File dialog box, select a credit file type and file format, click Choose file to browse to and select a file.
- Optionally, check Continue on Error.
When this option is checked (enabled), Setup continues uploading data regardless of how many upload errors may be logged and shown in the Upload Errors section. By default, this option is unchecked (disabled) and the upload stops when the first error is detected.
- Click Upload.
A record of the uploaded file and its status appears in the grid. Click the checkbox next to the record to review the Output section, which displays how many rows of the file are processed. Any errors that occur during the upload will appear in an Error section on this page.
Note: If there are multiple rows in the credit file, the last row will overwrite the first.
Deleting an Account Credit File
To delete an account credit file, click Data Uploads, click the checkbox next to the record and click Delete. The system will prompt you to confirm that you want to delete the file. After deleting the file, the Setup app removes the credit limit from all accounts listed in the file.