Order Book
Order Book overview
--- widget: ob layout: desc-tab title: Order Book overview AccordionID: ob-order-book-overview ---The Order Book widget displays all of your working orders. In the Order Book, you can view the status of your working orders, cancel orders, modify orders, place orders on hold, apply algos to orders, and retrieve the historical activity of an order.
With the Order Book widget, you can:
- Monitor your working orders
- Change the quantity or price of a working order
- Place an order on hold
- Delete single or multiple working orders
- Launch Order Management Algos (OMAs) for an order
- Display a history of an order's activity
Sorting
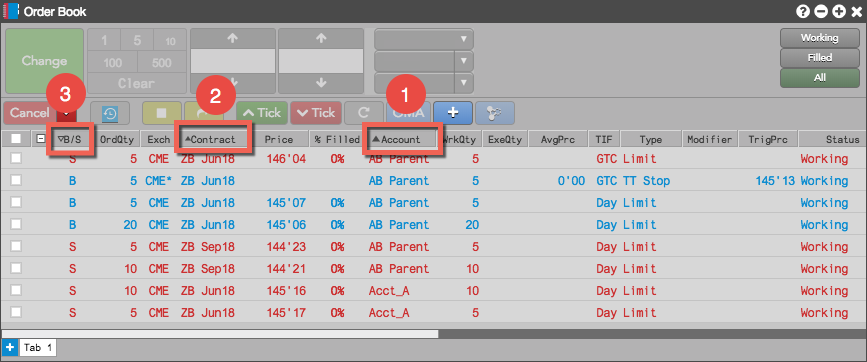
By default, the Order Book displays working orders in reverse chronological order based on the time each order was submitted, with the most recent orders appearing at the top. You can change the sort order by clicking the name of a column once for normal order and twice for reverse order (a third click removes the column from the sort). If you want to display the orders so that all the buy orders are shown first, followed by the sell orders, you would click the B/S column heading.

You can also sort the orders hierarchically using multiple columns by clicking the column headings in the order you want to sort while holding down the Shift key. The following example sorts the orders in the Order Book first by the Account column, then by the Contract column, and finally by the B/S column (reverse order).
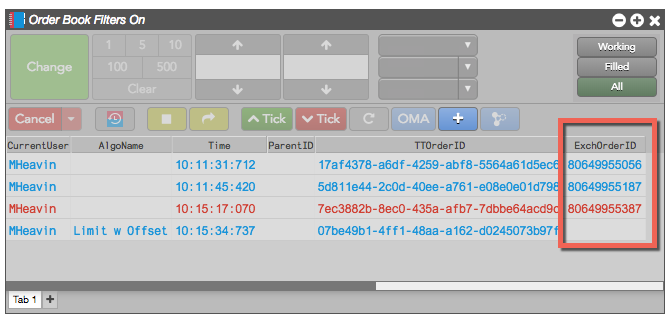
Trade Reference ID
You can view information for orders and block trades in the Order Book widget, as well as the Audit Trail and Fills widgets.
All exchange-provided Trade Reference IDs appear in the ExchangeOrderID column as shown in the image below.
Order confirmation in the Order Book
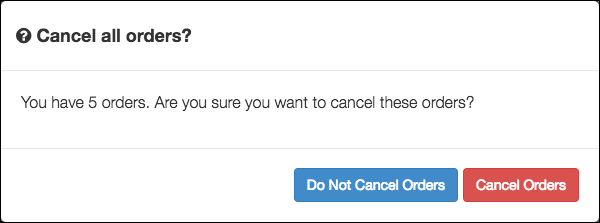
You have the option to confirm order cancellations when using "Cancel All", as well as confirm changes to working orders in the Order Book widget. This functionality is enabled using the "Cancel all" and "Modifications to working orders" settings on the Orders tab in workspace Preferences.
When the Cancel all preference is enabled, you'll be prompted to confirm the cancellation after you click Cancel All. Order cancellations are not submitted until you click Cancel Orders to confirm.
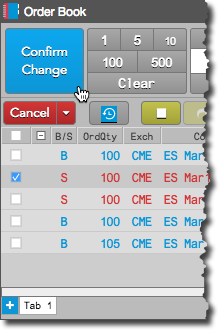
When the Modifications to working orders preference is enabled, the "Change" button displays "Confirm Change" when a working order is modified in the Order Book. Order changes are not submitted until you click Confirm Change.
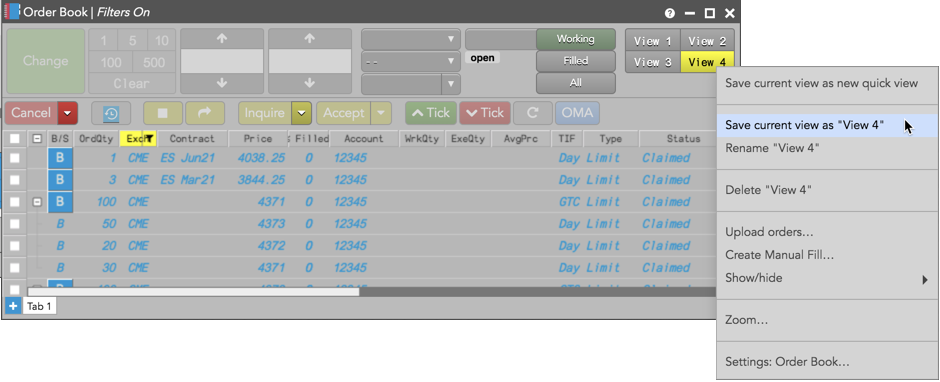
Order Book Views
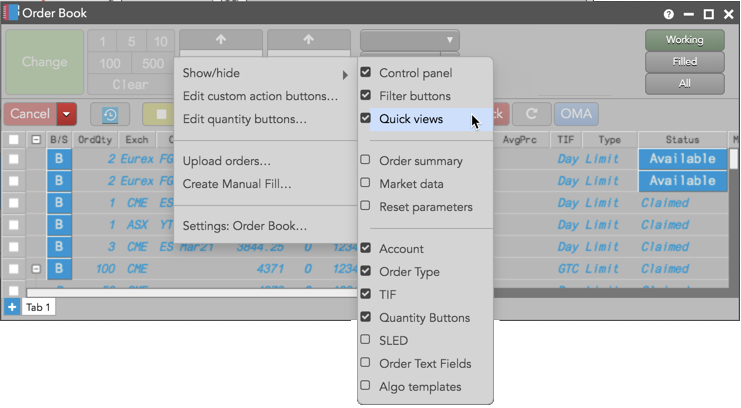
The Order Book control panel allows you to save currently applied filters as a "quick view" button. To enable this feature, select Show/hide | Quick views from the right-click menu in the control panel.
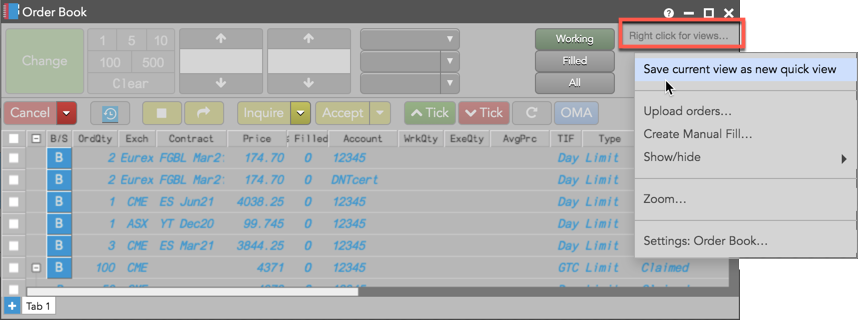
After enabling the feature, right-click in the upper right corner of the panel and click Save current view as new quick view to save your applied column filters as a view of the Order Book.
As you apply more filters to the Order Book, you can save them as additional quick view buttons using the Save current view as new quick view option. Clicking the button applies that view. Each view can be named, renamed, saved, and deleted from the right-click menu. If a view is modified, you can save the changes by selecting the current view (e.g., View 4).
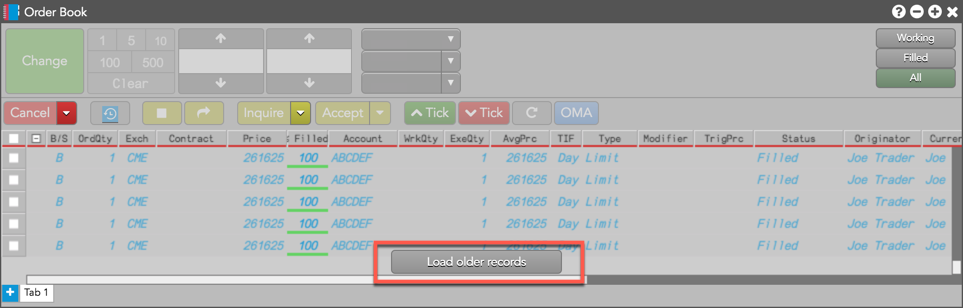
Viewing orders from previous sessions
When "Include orders from previous sessions" is enabled in your local settings, scrolling to the bottom of the orders pane may show the Load older records button. You can click this button to retrieve the next batch of data in chronological order.
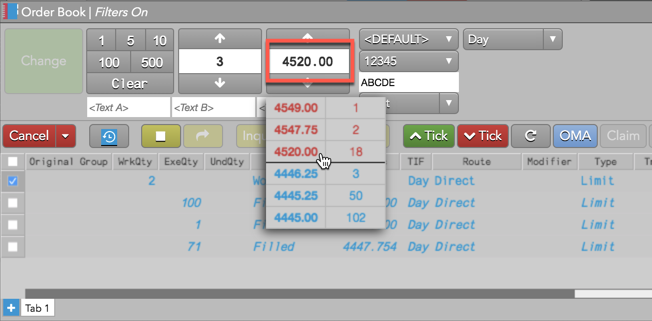
Floating Depth in the Order Book
The Floating Depth pop-up widget let's you quickly trade from a contract's market depth. The widget appears when you hover on a price or quantity in the Market Grid and Spread Matrix, or price or quantity edit control in the Order Book and Order Ticket.
To use the Floating Depth widget, enable the Show floating depth widget on hover option in the Order Ticket, Market Grid, Order Book, or Spread Matrix settings.
When shown, the Floating Depth widget displays up to three levels of depth for both bids and offers. You can click a price or quantity in a level of depth to seed that value in the price or quantity edit control in the Order Book.
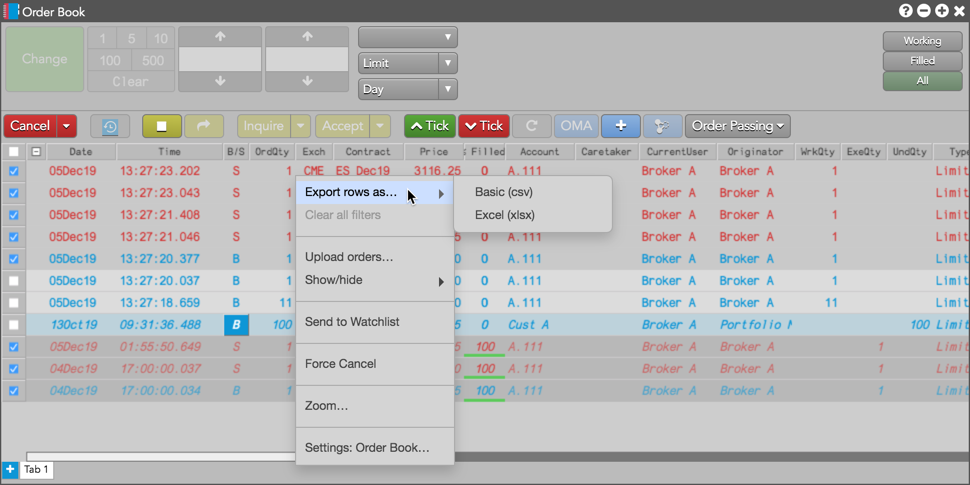
Exporting Order Book rows
You can also export Order Book rows to a .csv or .xlsx file. Select the rows you want to export, right-click in the selection, and click the the Export Rows as... context menu that appears. The selected fills are exported to a .csv or .xlsx file in your computer's download folder.