LME
Adding an LME connection
To add an LME connection:
- Click Connections in the left navigation panel.
- Click +New Connection
- Configure the settings in the General Settings section:

- Connection Enabled: Check this setting to activate the connection. Uncheck to deactivate the connection.
- Name: This is a required field for creating a connection.
- Exchange: Select LME. Only one exchange is allowed per connection.
- Select either Base or Precious in the Type field.
Configure the settings in the Additional Settings section.
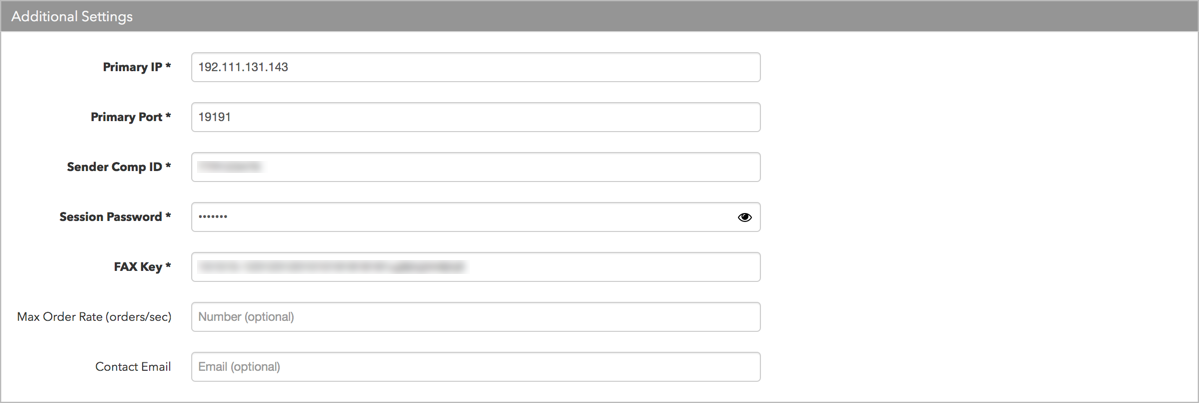
- Primary IP — Sets the exchange-provided primary IP address for connecting the order session to the exchange. This is a required setting.
- Primary Port — Sets the exchange-provided primary port for connecting the order session to the exchange. This is a required setting.
- Sender Comp ID — Identifies the name of your firm in FIX Tag 49 in all outbound messages sent via the connection. This is an exchange-provided credential that is required for connecting the session. This is a required setting.
- Session Password — Sets the exchange-provided session ID password for connecting to the exchange. Sent to the exchange as Tag 96. This is a required setting.
- FAX Key — Sets the 32 byte FAX key provided by the exchange. The FAX key is part of the LME Clearing Account value also provided by the exchange and identifies the exchange-assigned key used to encrypt the Session Password. This is a required setting.
-
Max Order Rate (orders/sec) — (Optional) Sets the maximum number of orders per second that a user can enter per connection. This limit cannot exceed the exchange-defined order rate maximum. This setting is in the Additional Settings section.
Contact Email — Optionally, add a best contact email that TT can use to contact your firm if needed.
-
Click Create. You can select the connection in the data grid and review the connection settings in the Settings tab.
-
Click the Accounts tab to assign an existing account to the connection. Multiple accounts can be added to a single connection.
See also: Creating a New Account
Note The connection will not become active until at least one account is assigned.
- Click Save Changes.
Configure the following LME (London Metals Exchange) settings per connection: