DGCX
Adding a DGCX connection
To add a DGCX connection:
- Click Connections in the left navigation panel.
- Click +New Connection
- Configure the settings in the General Settings section:

- Connection Enabled: Check this setting to activate the connection. Uncheck to deactivate the connection.
- Name: This is a required field for creating a connection.
- Exchange: Select DGCX. Only one exchange is allowed per connection.
- Use the default setting in the Type field.
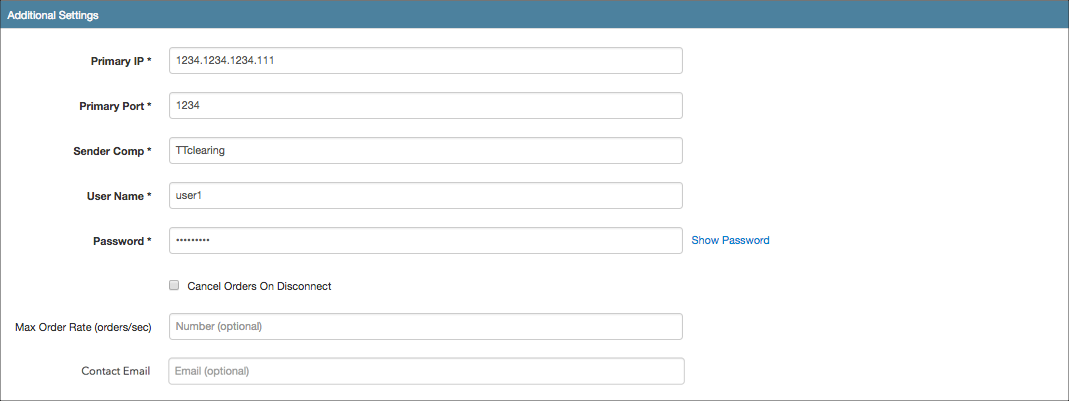
Configure the settings in the Additional Settings section.
-
Max Order Rate (orders/sec) — (Optional) Sets the maximum number of orders per second that a user can enter per connection. This limit cannot exceed the exchange-defined order rate maximum. This setting is in the Additional Settings section.
- Sender Comp — Identifies the name of your firm in FIX Tag 49 in all outbound messages sent via the connection. This is an exchange-provided credential that is required for connecting the session. This is a required setting.
- Password — Sets the exchange-provided session ID password for connecting to the exchange. Sent to the exchange as FIX Tag 554. This is a required setting.
- Primary IP — Sets the exchange-provided primary IP address for connecting the order session to the exchange. This is a required setting.
- Primary Port — Sets the exchange-provided primary port for connecting the order session to the exchange. This is a required setting.
- Username — Sets the exchange-provided username on the session. Sent to the exchange as FIX Tag 553. This is a required field.
- Cancel Orders On Disconnect — Sets whether orders are retained or purged if a session disconnects from the exchange by setting FIX Tag 18 on new orders. When this setting is checked, orders will be purged if the session disconnects from the exchange host. When unchecked, orders are retained on disconnect. This setting is unchecked by default.
Contact Email — Optionally, add a best contact email that TT can use to contact your firm if needed.
-
Click Create. You can select the connection in the data grid and review the connection settings in the Settings tab.
-
Click the Accounts tab to assign an existing account to the connection. Multiple accounts can be added to a single connection.
See also: Creating a New Account
Note The connection will not become active until at least one account is assigned.
- Click Save Changes.
Configure the following DGCX (Dubai Gold and Commodities Exchange) settings per connection: