Position Manager
Creating a manual fill
Note: As an administrator, the "Update positions" setting must be enabled in Setup for each account available to you in order to create manual fills for that account.
To create a manual fill:
- In the workspace menu bar, click Widgets | Miscellaneous | Position Manager.
Tip: You can also open Positions Manager by clicking Create Manual Fill from the context menu when selecting a row in the Positions widget.
- Select Admin Fills or Local Fills as the manual fill mode and click + Add Row.
- Enable the following optional settings as needed:
- Price off tick — If checked, allows you to enter an off tick price per leg for instruments that support tick sizes smaller than what is displayed.
Note: Off-tick prices can be entered for instruments that tick in fractions (displayed with an apostrophe). For example: ZB Jun25 with a price of 116'26.
Enable the 'Price off tick' checkbox to switch the price input control to accept decimal prices (such as 115.12345678) and create the fill with up to eight (8) digits of decimal precision.
- Create leg fills — If checked, this setting auto-creates leg fills in addition to the spread fill when creating a manual fill on an exchange-listed spread contract.
- Price off tick — If checked, allows you to enter an off tick price per leg for instruments that support tick sizes smaller than what is displayed.
- In the manual fill row, click a cell in each of the following columns to enter or select a value:
- Contract — Select a contract by using the product search or market explorer. The settlement price for the selected contract appears in the Price column.
- Account — Select an account for the manual fill. All accounts available to you are displayed. An account is required for a manual fill.
- User — Optionally, select a user for the manual fill. Only users assigned to the account are displayed in the dropdown menu.
- Side — Select which side of the trade to apply the manual fill. Click "B" for Buy or "S" for Sell.
- Quantity — Enter a quantity for the manual fill.
- Price — Enter a price for the manual fill or use the default settlement price for the selected contract.
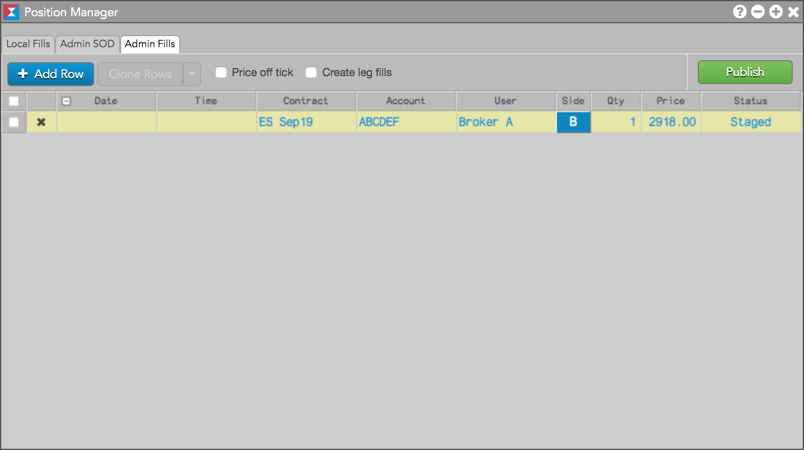
Before the manual fill is published, the Status column displays as "Staged". To delete a manual fill before it's published, click the "x" in the manual fill row.
- To create additional manual fills, click + Add Row and repeat the previous Step.
- Review each manual fill and click Publish.
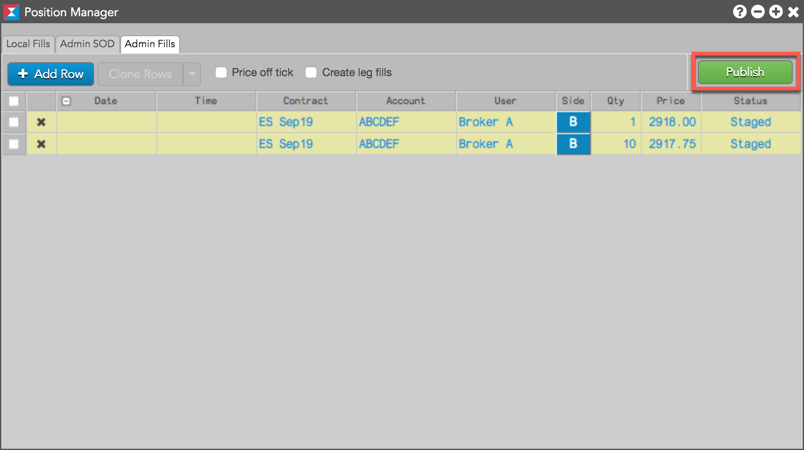
The position in the account is modified in the Positions widget, and the fill appears in the Fills widget for each user sharing the account.
Tip: To quickly offset a manual fill, right-click the published fill in Position Manager and select Clone selected rows. In the new row that appears, click the B/S button to flip the side and click Publish.
Creating a manual fill from Market Grid, Order Book, or Orders and Fills
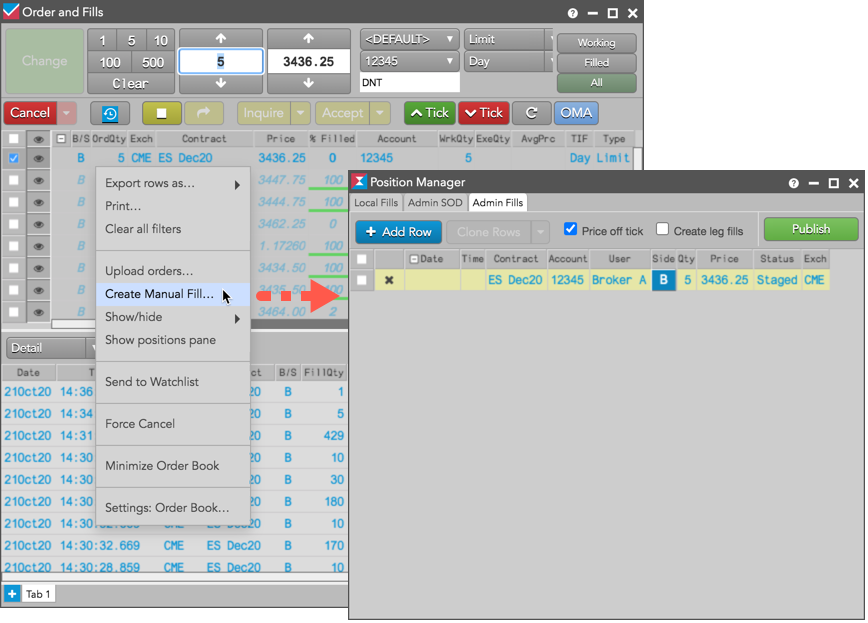
Manual fills can be created for a contract by using the context menu in the Market Grid, Order Book, or orders pane of the Order and Fills widget. To create a manual fill, right-click the contract or order row in these widgets and select Create Manual Fill....
When this option is selected, the Position Manager widget opens and is seeded with the contract name, price, quantity, and account for the selected instrument. You can then create the manual fill using Position Manager.
Note: When you right-click an order row in the Order Book or orders pane of the Order and Fills widget to select Create Manual Fill..., this option creates a manual fill for the contract but does not fill the order.