Users
Managing users
To manage users in your company, the Users tab provides you the ability to do the following:
- Change a user profile
- Clone a user
- Set administrator, trade, and algo permissions for a user
- Delete a user
- Deactivate a user
- Set an internal company user
- Re-invite a retired user
- View user login history
- Manage environments for a user
Change a user profile
You can change the following on the Users | Profile tab:
- Contact information
- User status: Deactivating a user or re-inviting a user
- Trade mode (e.g., TT Pro)
- Access to advanced options features
- Ability to create REST API keys
- User Groups
- Company Relationships
To change a user profile:
- Click Users from the left navigation pane.
The Users data grid appears.
- Select a user from the grid or enter a user name in the Search box.
The user's Profile tab is displayed.
- Make the necessary changes in each section on the Profile tab and click Save.
- For more details about each section, refer to Adding a New User.
Cloning a user
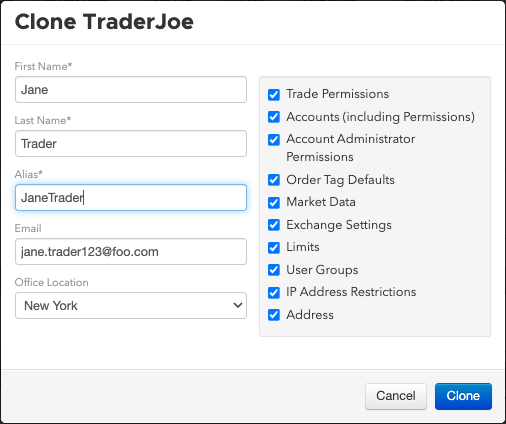
You can clone (copy) a user's settings for a new user and add them to your company using the Clone button.
To clone a user:
- Click Users from the left navigation pane.
The Users Grid appears.
- Select a user from the Grid or enter a user name in the Search box.
- Click the Clone button.
- Complete the form and uncheck any options that you do not want to clone (e.g., Trade Permissions). All options are checked by default.
Click Clone.
The cloned user's profile appears on the Users screen.
Deleting a user
You can only delete a user that belongs to your company. When you delete a user, they are no longer visible in your company'S Users Grid and are no longer visible to any companies with whom they were shared. They also cannot use any of the company's resources. However, their profile and settings remain in the TT system.
Note: If the user has an invitation pending, the deletion automatically revokes the invitation.
To delete a user:
- Click Users from the left navigation pane.
The Users Grid appears.
- Select a user from the Grid or enter a user name in the Search box.
- Click the Profile tab.
- Click XDelete at the top of the user's profile screen.
The deletion is recorded in the change log on the Reports tab in the left navigation pane.
Deactivating a user
You can deactivate any user in your company. When you deactivate a user, the user cannot log in to trade via the TT platform, and does not have access to your companies' resources or any resources of companies with whom the user is shared.
If users are shared with a company and the shared company deactivates them, those users cannot log in and access other companies with whom they are active. These users also cannot access the shared company that deactivated them.
To deactivate a user:
Click Users from the left navigation pane.
The Users Grid appears.
- Select a user from the list or enter a user name in the Search box.
- Click the Inactive checkbox in the Status section.
The user name appears grayed out in the bottom portion of the Users List with the word "INACTIVE" displayed.
Setting an internal company user
As an administrator, you can flag certain users as direct employees of your firm by checking the Internal Company User checkbox under User | Profile | Status. This setting can distinguish your direct employees from your customers who who have accepted invites to trade with your company, but are not employees of your firm.
To set an internal only user:
Click Users from the left navigation pane.
The Users Grid appears.
- Select a user from the list or enter a user name in the Search box.
- Click the Internal Company User checkbox in the Status section.
- Click Save Changes.
Re-inviting a retired user
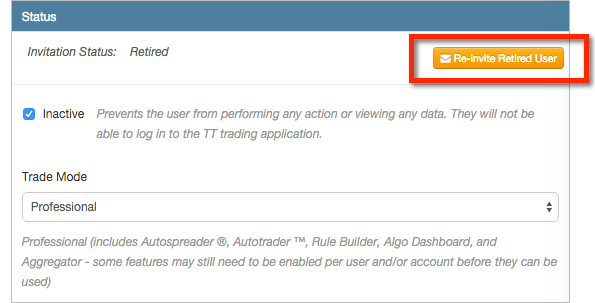
You can re-invite users that were retired due to having accepted another company invitation. When the user re-joins, the user's original workspaces and preferences will be restored. Retired users will remain with the other company until they accept your invitation.
Note: An active user with your company reverts to a provisional user when they join another company. Their invitation status changes to “Invitation Status: Permanently Retired” and you can no longer re-invite or revoke the invitation. However, the user's settings remain in your company database and are configurable and transferable.
To re-invite a retired user:
- In the Users data grid, select a retired user.
- Click the Profile tab.
In the Status section, click Re-invite Retired User.
Note: Only the TT account used to accept the original invitation may be used to accept the re-invitation.
Viewing login history
Use the Login History tab on the User's screen to view a user's history of logging in to the TT platform. You can view the login history of your company users, as well as users shared with your company.
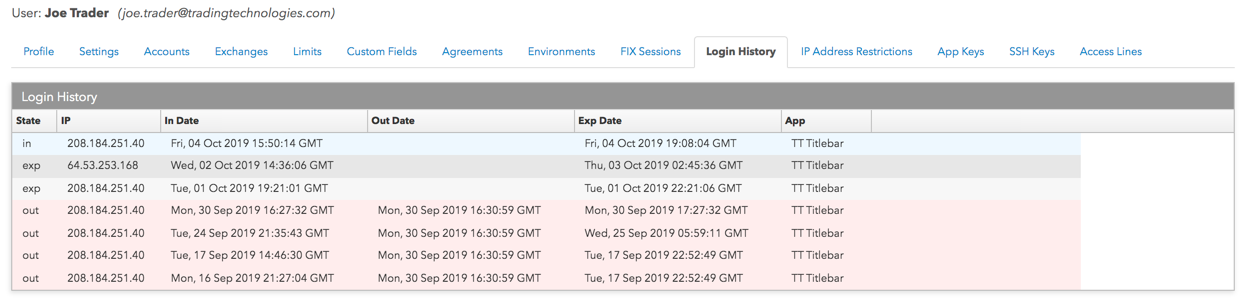
To view user login history, select a user in the data grid and click the Login History tab. The Login History section includes the following columns:
- State — Shows the status of the user's session:
- in: The user has logged in to TT and the session is active.
- out: The user has logged out of TT.
- exp: The user's token has expired.
- IP — The IP address of the user's session.
- In Date — The time and date the user logged in to the TT platform.
- Out Date — The time and date the user logged out of the TT platform.
- Exp Date — The time and date the token issued at login expires. When the user logs in, the token is issued and is valid for one hour. If the user is actively logged in, the token renews every hour. If the user is not active, the token may expire before the user logs out of the platform.
- App — The application used for logging in to the TT platform.
Managing Environments for a User
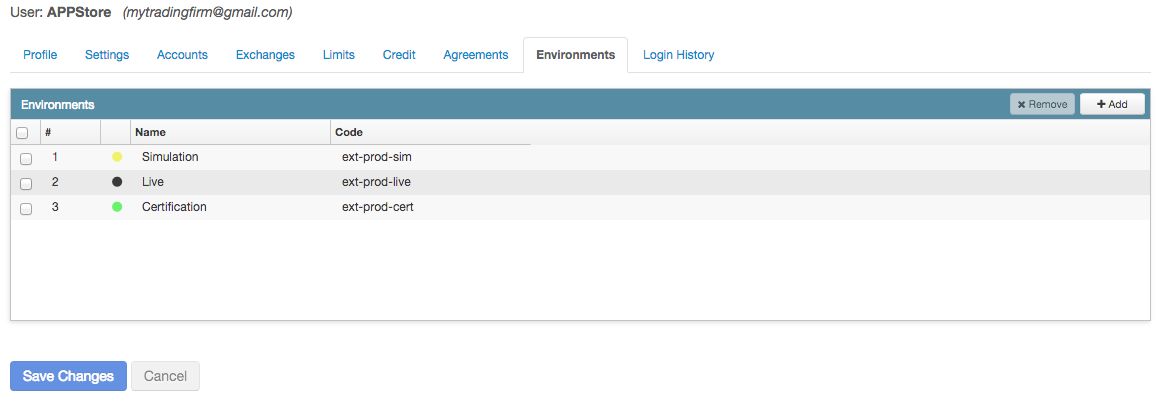
As a company administrator, you can use the Environments tab to view, add, or remove trading environment access (e.g., simulation, production, uat, etc.) to users in your company. Non-administrative users do not have access to this tab.
To manage environments for a user...
- Click the Environments tab.
- To add user access to an environment, click Add.
- To remove user access to an environment, click the checkbox next to the environment and click Remove.