Users
Administering user groups
As a company administrator, use the User Groups tab to add, view, and edit a user group, which is a subset of accounts and users in your company. As an administrator, you can administer all user groups in your company as well as any child groups associated with those groups.
Creating a user group
To create a user group:
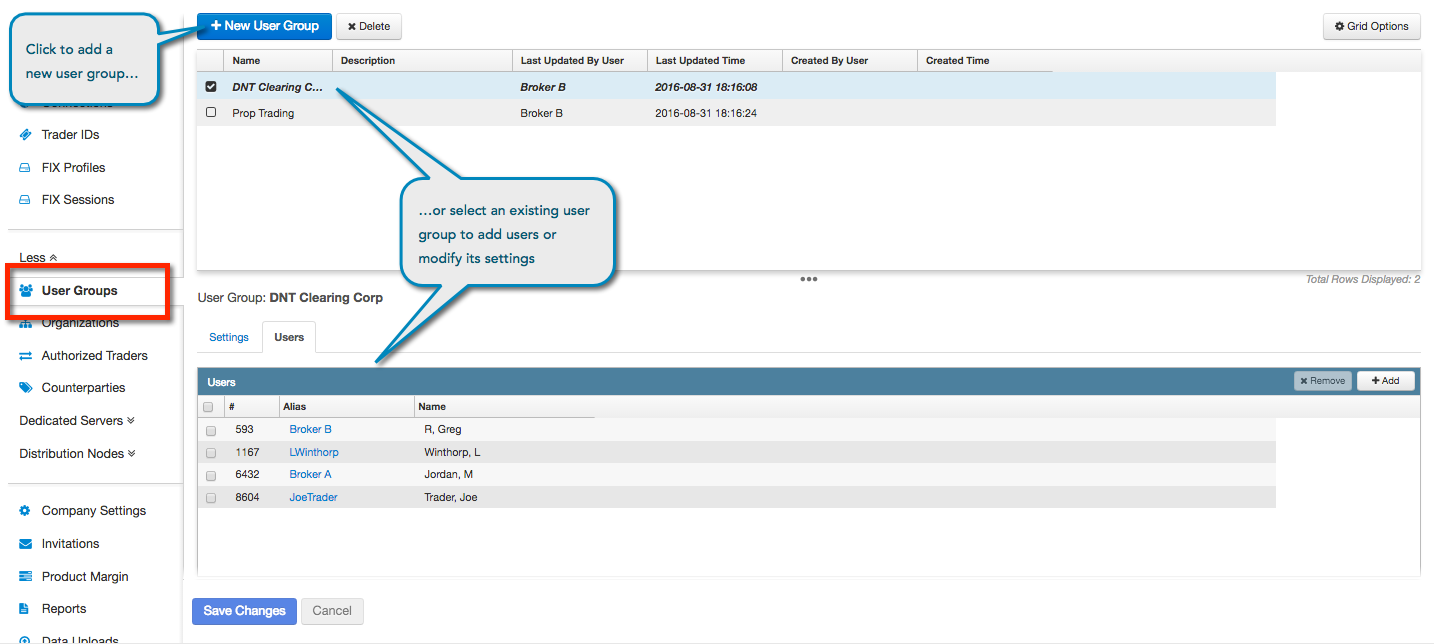
- Click More | User Groups in the left navigation pane.
- Click the + New User Group button.
- In the New screen, enter a Name (required) and Description (optional) for the user group.
- To add users to the user group, click the Users tab and click + Add.
In the Select Users screen, click a user and click Select. Use Shift + Click to select multiple users.
Note: A user can be assigned to multiple user groups.
- Click Save Changes.
Modifying a user group
To modify a user group:
- Click More | User Groups in the left navigation pane.
Click the check box next to a user group in the data grid.
The tabs and details for the user group appear at the bottom of the screen.
- Modify the group name and description in the User Group Information section as needed.
- To add or delete users, click the Users tab.
- To add users to the user group, click the Users tab and click + Add.
In the Select Users screen, click a user and click Select. Use Shift + Click to select multiple users.
Note: A user can be assigned to multiple user groups.
- To delete users from the user group, click the check box next to a user to select it and click x Remove. Multiple users can be selected.
- Click Save Changes.