Building your first algo
Creating the exit order
In this section, you will create an exit order a number of ticks above the average open price you calculated in the previous Capturing fills data section. The exit order will use the accumulated fill quantity of the entry order as its order quantity and will add a number of ticks to the average open position as its order price.
This section covers:
- Using Jump blocks to clean up the view of the algo.
- Using arithmetic blocks to calculate an exit price based on fills data.
Configuring the exit order
To begin configuring the exit order:
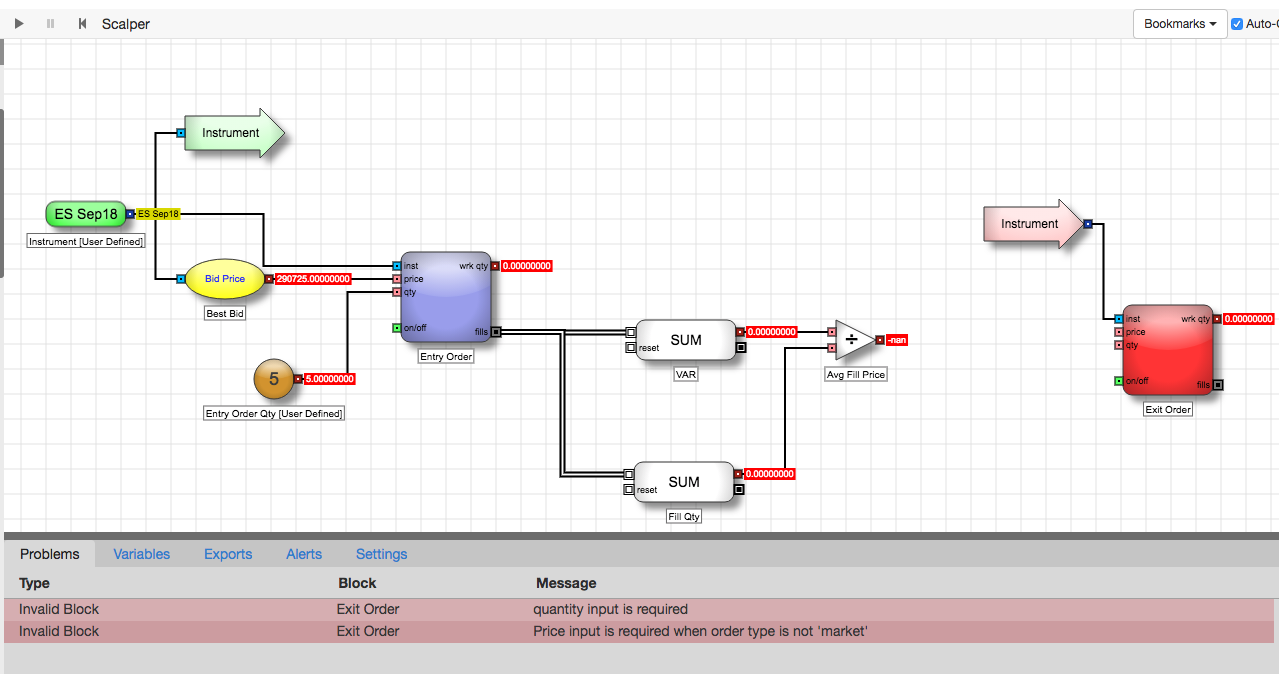
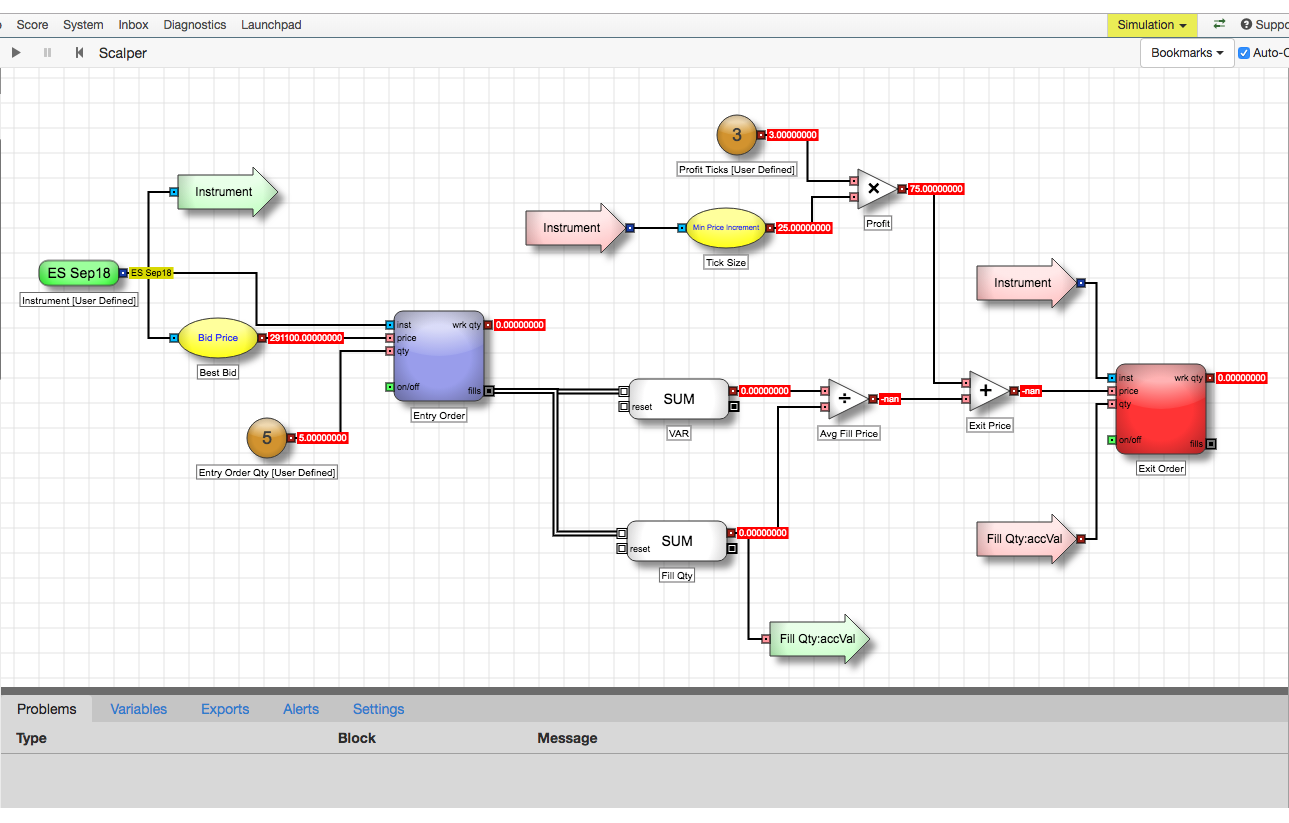
- From the Blocks panel, drag and place an Order block to the right of the Avg Open Price block.
-
In the Block Properties panel, make the following changes:
- Set Name to Exit Order.
-
Set the Side parameter to Sell.
Notice the block color changes to red, providing a visual indication that the block represents a sell-side order. Just like when you added the Entry Order block, adding the Order block caused a number of issues to be displayed in the Problems tab. As you complete your algo, these issues will be resolved.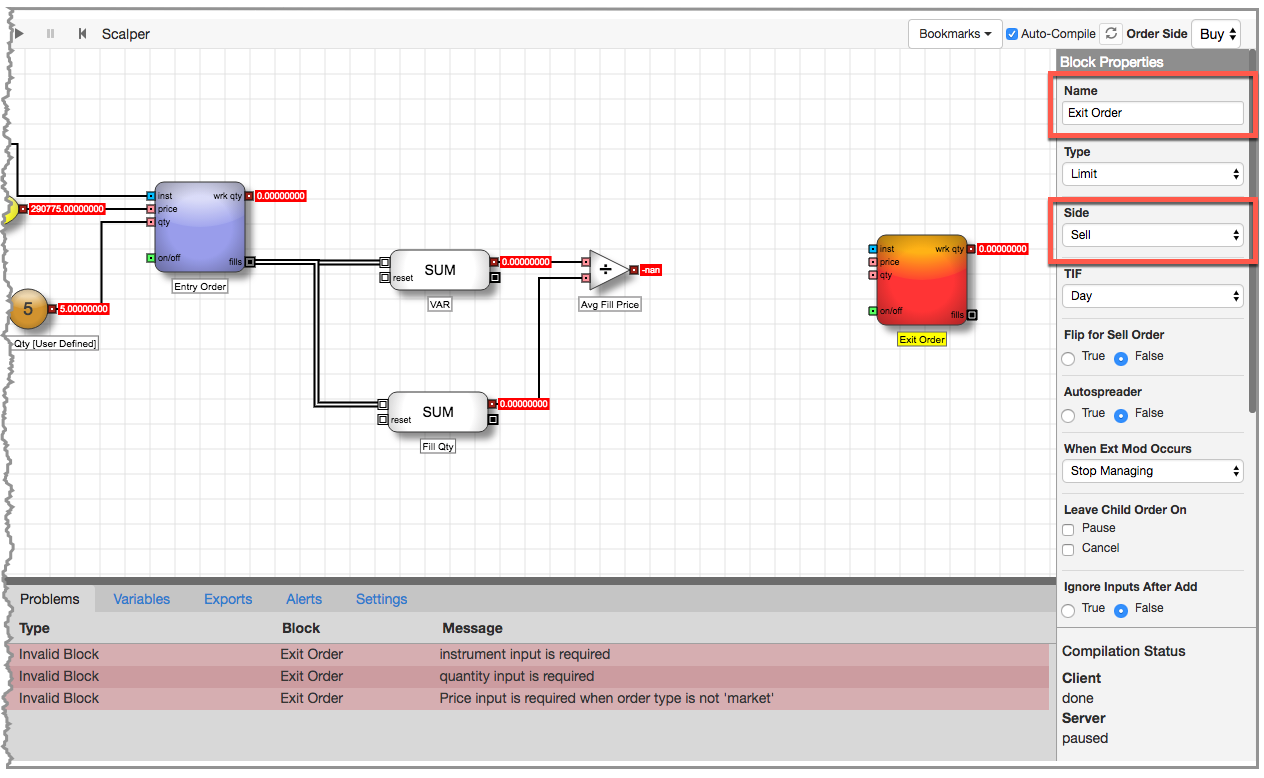
-
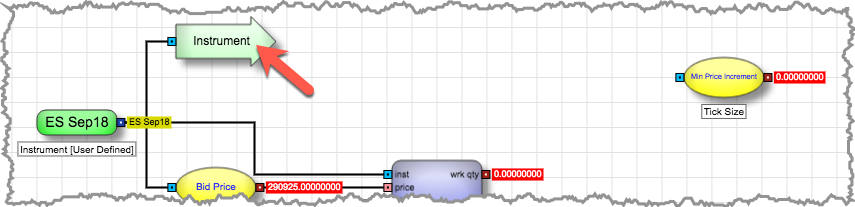
The Exit Order block needs an Instrument input, so connect the Instrument block output to the Exit Order block's inst input port by clicking and dragging.

-
As you can see, using an edge to connect the ports can make the algo look a little cluttered. You can use Jump blocks to clean up the display of the algo.
-
Right-click on the edge you just created, and select Convert to jump from the context menu.
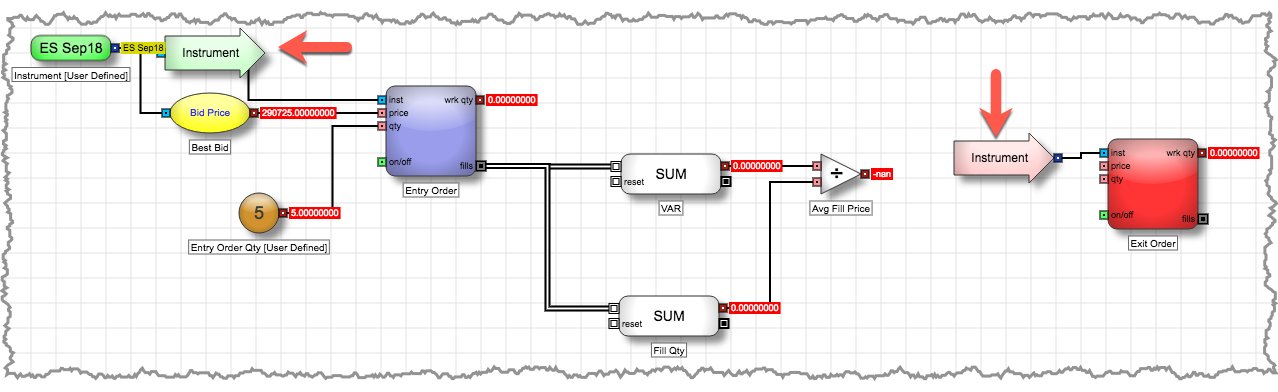
The edge is replaced by a green source Jump block that is connected to the Instrument block and a pink destination Jump block connected to the inst input port of the Exit Order block, both labeled with the name of the source Instrument block to indicate a connection between the two.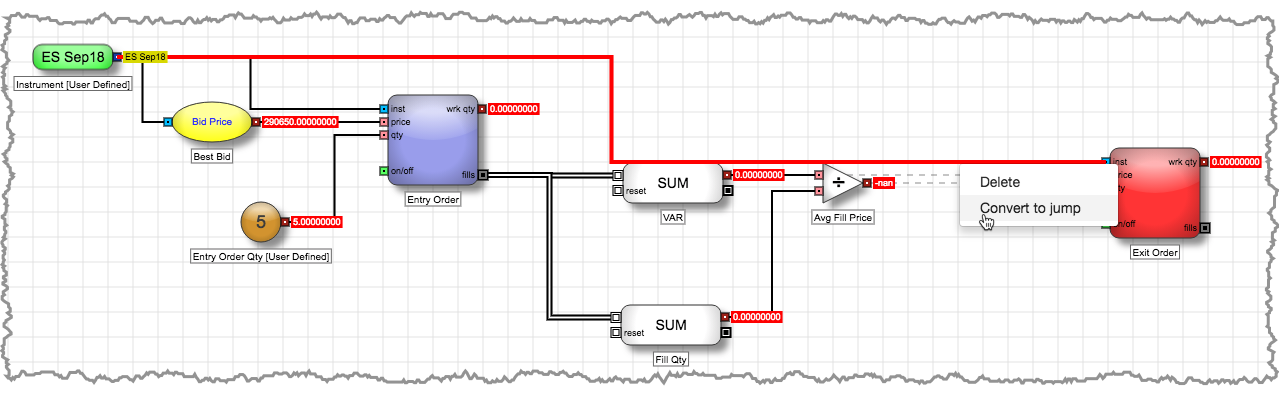
-
Reposition the two Jump blocks for a cleaner look and to leave room for completing the remaining connections to the Exit Order block.
-
Right-click on the edge you just created, and select Convert to jump from the context menu.
-
For your algo, you want to use the accumulated fill quantity for the exit order quantity. You will use Jump blocks for this connection as well.
-
Right-click the Fill Qty block's red numeric output port and select Add jump block from the context menu.
Notice a green Jump block is added with its label comprised of the block and port name (Fill Qty:accVal).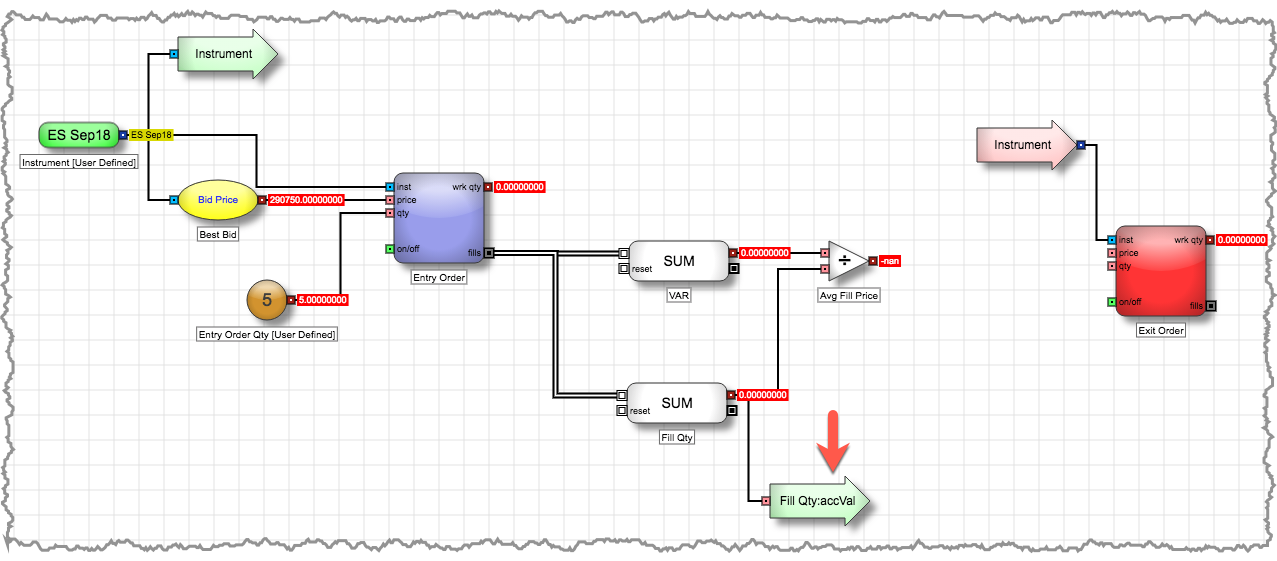
-
Right-click the Fill Qty:accVal Jump block and select Create destination block from its context menu.
A pink destination Jump block labeled Fill Qty:accVal is added to the canvas near the source Jump block.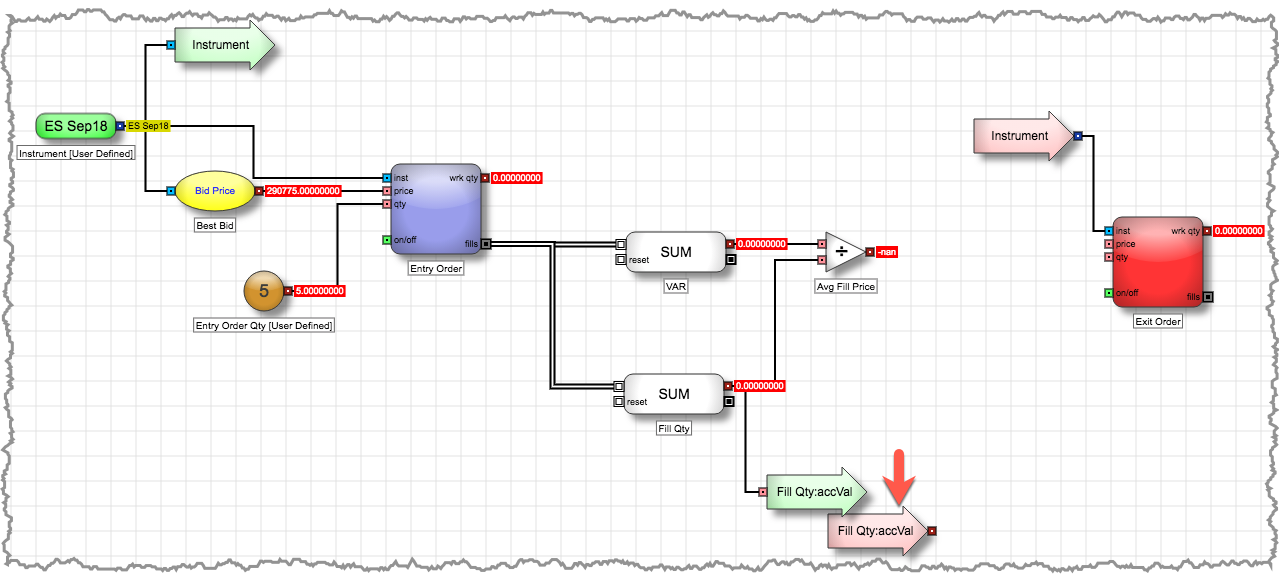
-
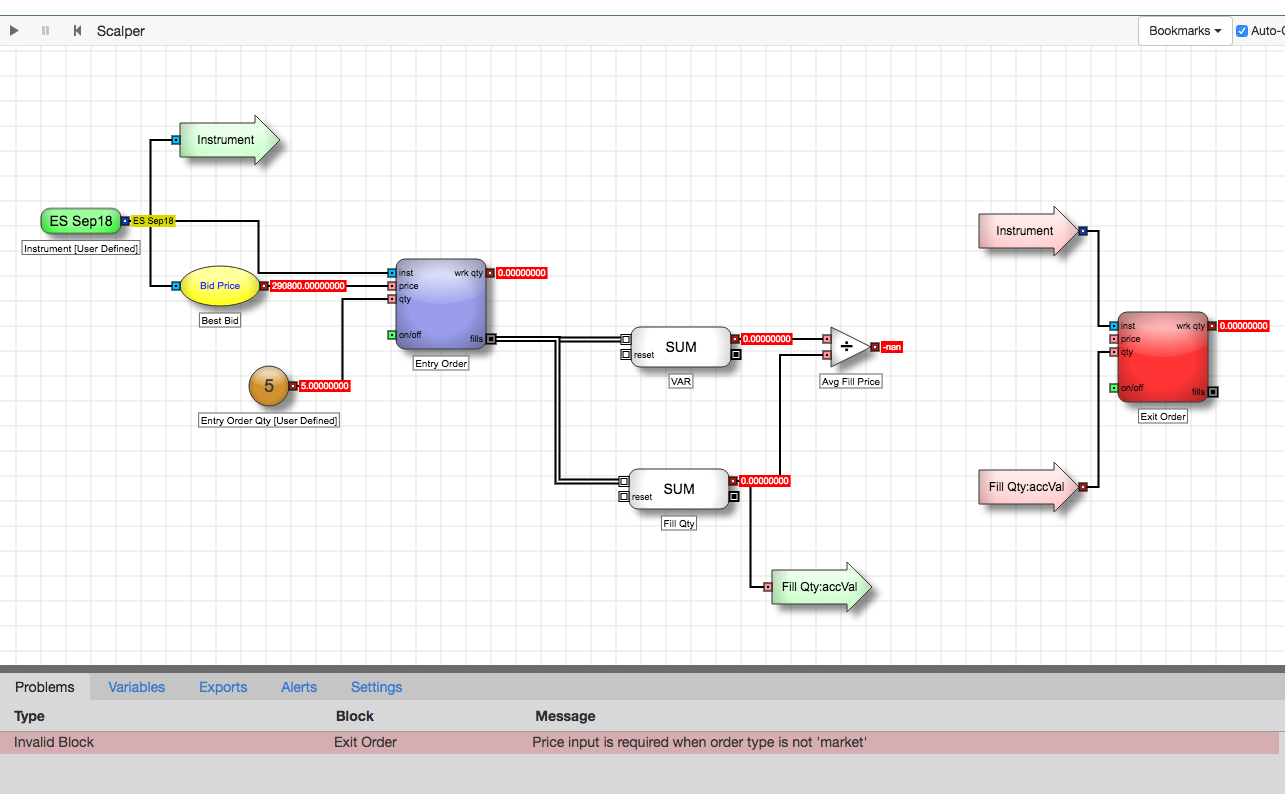
Move the destination Fill Qty:accVal block near the Exit Order block and connect it to the qty input port.
-
Right-click the Fill Qty block's red numeric output port and select Add jump block from the context menu.
Determining the price for the exit order
All that is left to complete your algo is to determine the price of your exit order. You want to set your profit target at three ticks higher than the average open price, but allow the user to change the profit target.
To determine the exit order price:
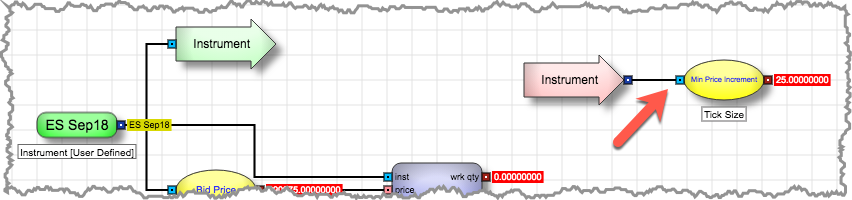
- In the Blocks panel search field, type min and drag the Min Price Increment Field block to the canvas. Then change is Name to Tick Size.
-
Like the Best Bid Field block you added in the entry logic, the Min Price Increment Field block also needs an Instrument connection. You will again use Jump blocks to connect the two blocks.
-
Right-click on the green Instrument source Jump block and select Create destination block from its context menu.
-
Move the new Instrument destination Jump block near the Min Price Increment block and connect the two blocks.
-
Right-click on the green Instrument source Jump block and select Create destination block from its context menu.
-
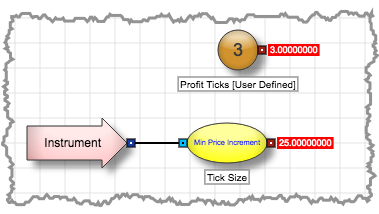
Next, you will use a Number block to specify the number of ticks away from the average open price you want to use for the exit order. Add a Number block to the canvas and set its following block properties:
- Set Name to Profit Ticks.
- Set Default Value to 3.
- Set Variable Type to User Defined.
-
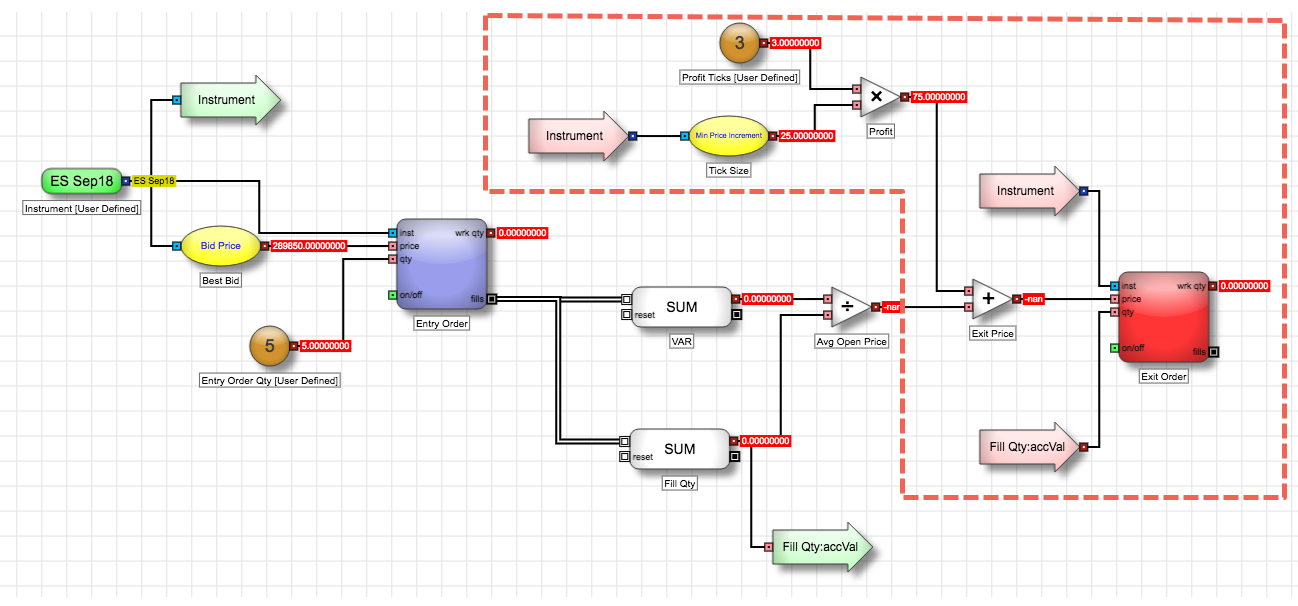
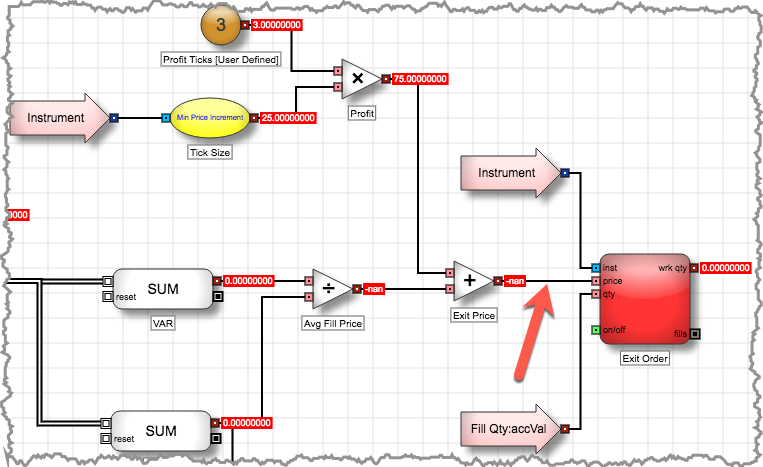
To determine the price of three ticks, you need to multiply the values of the Tick Size and Profit Ticks blocks.
- In the Blocks Panel search field, type mult and drag the Multiply block to the canvas and change its Name to Profit.
-
Connect the Profit Ticks and Tick Size block outputs to the Profit block's inputs.
Notice the Profit block output shows the value of three ticks for the selected Instrument.
-
Now you are ready to calculate the price for the exit order.
- Place an Add block between the Avg Open Price and Exit Order blocks; then rename it to Exit Price.
-
Connect the Profit and Avg Open Price block outputs to the Exit Price block's inputs.
Notice the Exit Price block output does not show the result of adding the two blocks. Because the Avg Open Price block cannot calculate its values until the algo is running and fills are received, the output displays nan.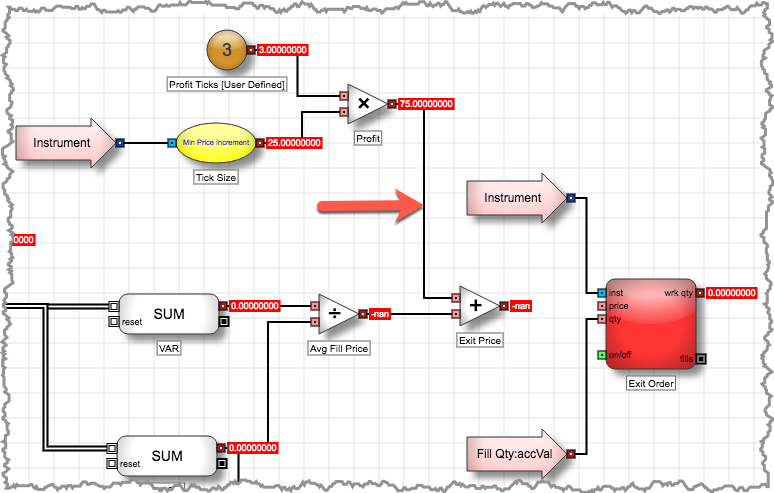
-
Connect the Exit Price block output to the Exit Order block's price input port.
Your algo is now complete and ready for testing.
Testing your completed algo
The Scalper algo can now be tested to verify that it is behaving as expected. For information on testing an algo, consult the Testing the entry logic section of this series.
To test the algo:
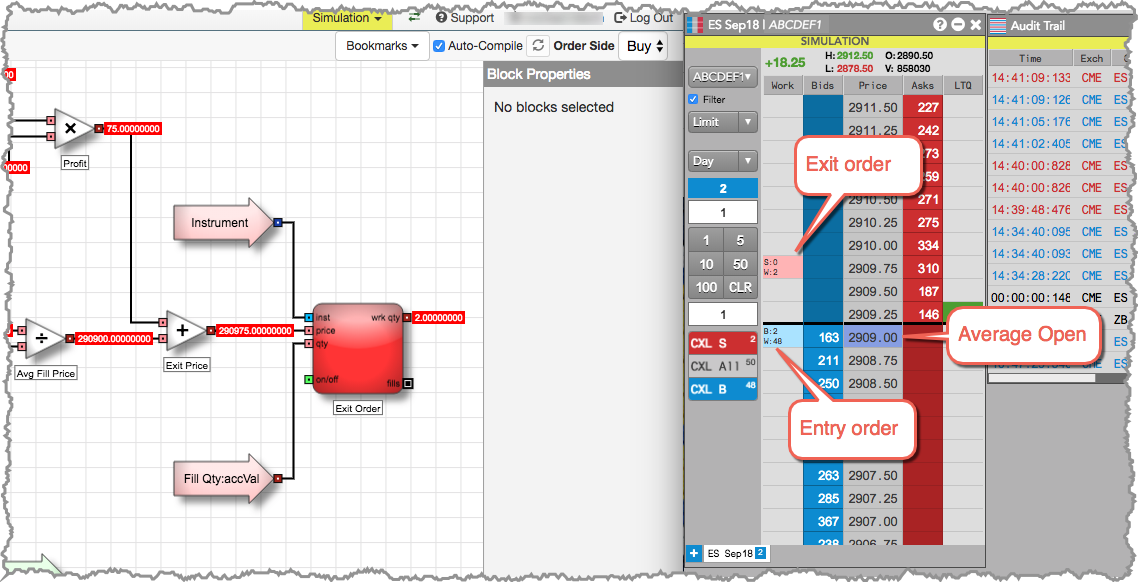
- Start the algo to place an entry Buy order at the Best Bid.
-
When a fill is received, verify that an exit Sell order is placed three ticks above the average open price.
- Stop the algo and reset. You should also use the MD Trader to flatten your position.
- Increase the value of the Profit Ticks variable and start the algo.
- Verify that an exit order is placed at the newly designated number of ticks above the average open price when a fill is received.
- Stop the algo.
Conclusion
This basic scalper logic is now complete. From here the scalper's order blocks can be virtualized so that the Scalper algo can run continuously and maintain position in queue, a stop order can be added to make this algo behave like a bracket order, the entry logic can be edited to make the Scalper algo an Order Management Algo (OMA) - and much more.